Taming the Managed Solution Beast - How to Update Environment Variables
May 10, 2024
1 min
Here is a tutorial on creating an Inventory Order System Using SharePoint and PowerApps.
We will create the following Lists on our SharePoint site.
This would hold available items that can be ordered or requested.
| Column Name | Column Type | Description |
|---|---|---|
| Title | Single Line of Text | This would be use for short description of item |
| Item Description | Multiple lines of text | Addition Description about the item |
| Price | Currency | |
| Imagelink | Hyperlink or Picturey | This would be a Picture Column |
| Current Qty | Number | |
| Min Qty | Number | This would be use for automation whenever the Quantity of the item is low |
This would be the List for saving the Orders Details
| Column Name | Column Type | Description |
|---|---|---|
| Charge Code | Single Line of Text | This optional but if you need some kind of code on where to charge the bill |
| Order Totals | Currency | |
| Order Comments | Multiple lines of text | Additional Instruction or Comment for each Order |
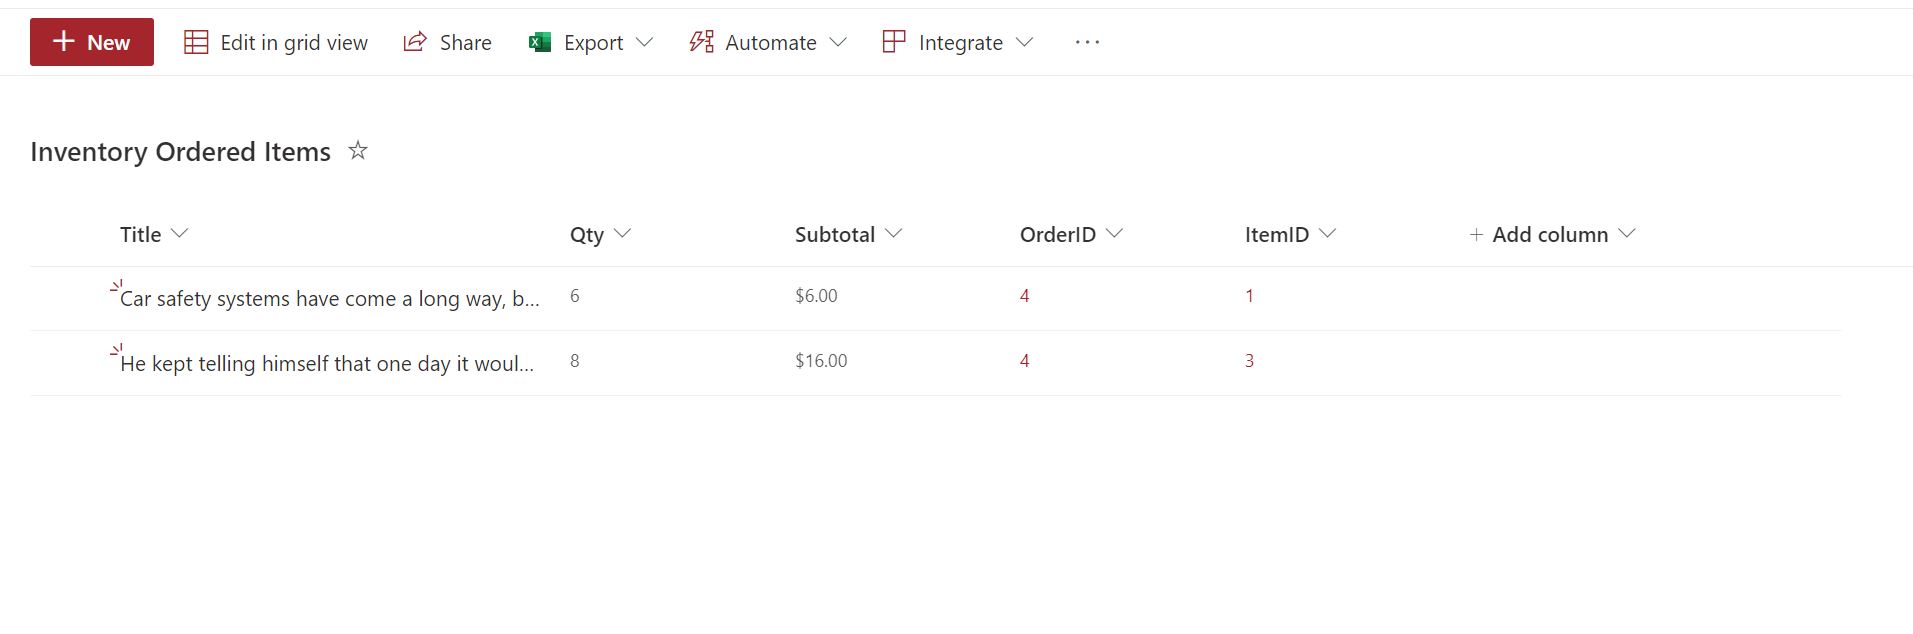
This List holds the information of all items Ordered by the user.
| Column Name | Column Type | Description |
|---|---|---|
| Title | Single Line of Text | Copying the Title from the “Inventory Items” lists |
| OrderID | Lookup | This is referencing to “Inventory Orders” Lists |
| ItemID | Lookup | This is referencing to “Inventory Items” Lists |
| Qty | Number | Quantity of item Ordered |
| Subtotal | Currency | Dollar Amount it costs |
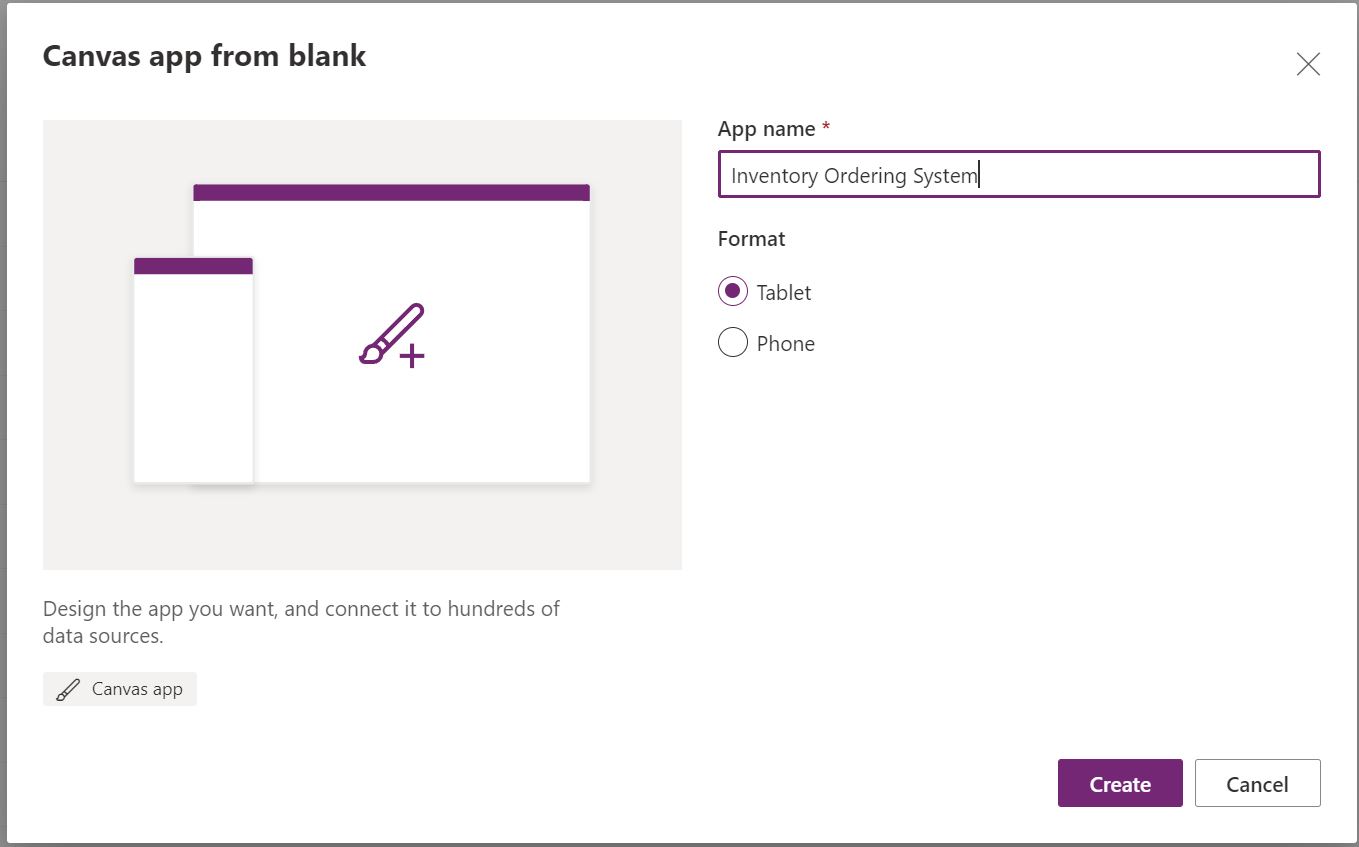
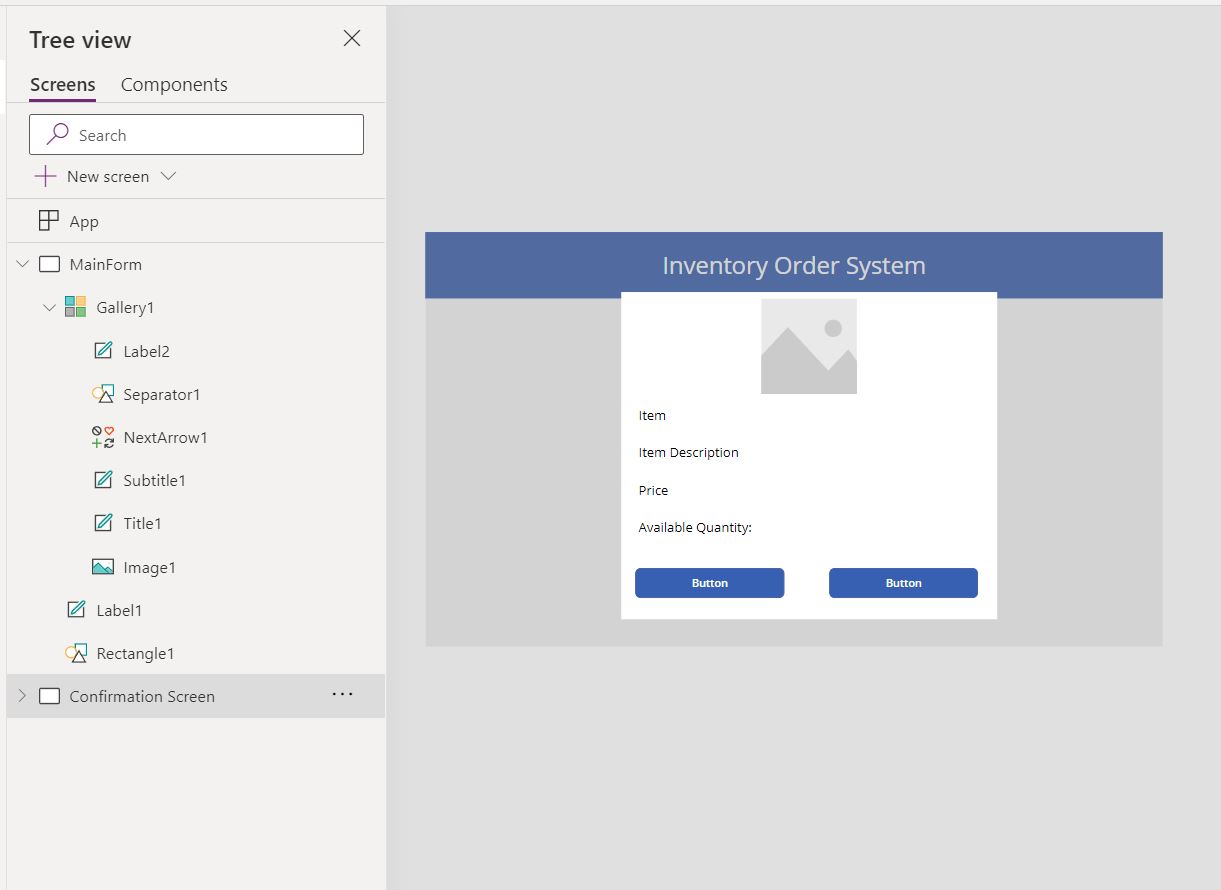
Now let’s create a Canvas Form in Power Apps; we will call it “Inventory Ordering System”
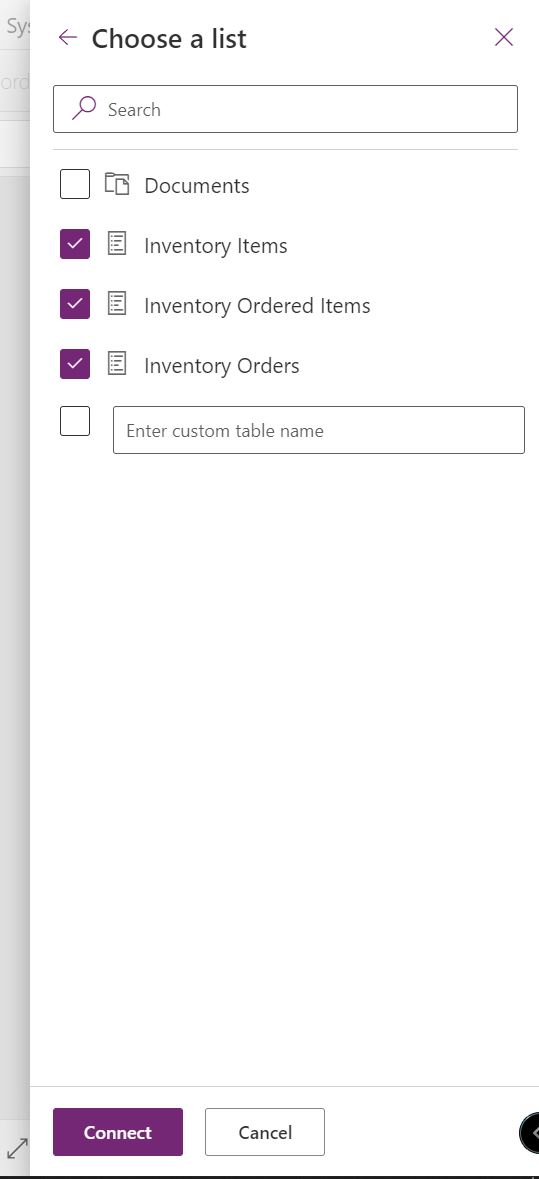
Let’s connect our Form to our SharePoint Lists that we created earlier.
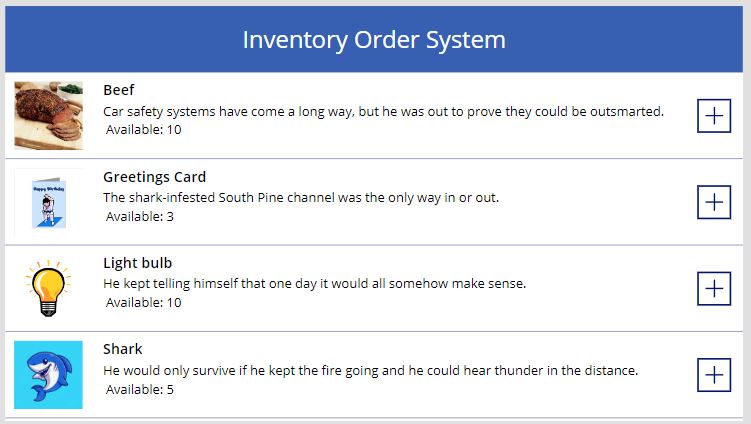
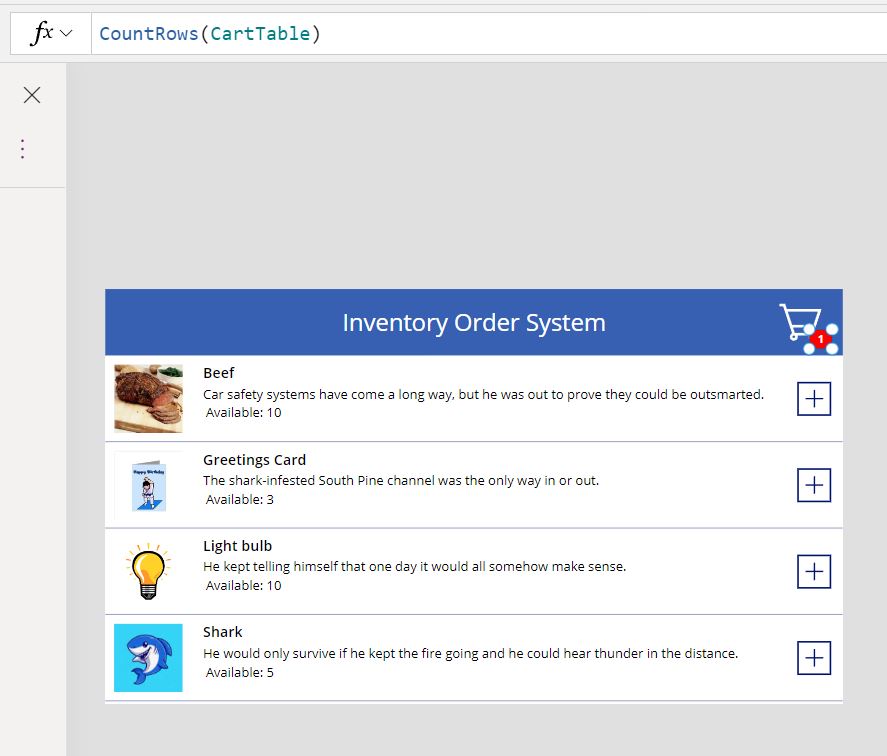
Add a vertical Gallery in your Form and connect it to your “Inventory Items” Lists.
Now let’s add a new screen and call it “Confirmation Screen.”
After let’s go back to our “MainForm,” and on our Gallery, we need to change the OnSelect function.
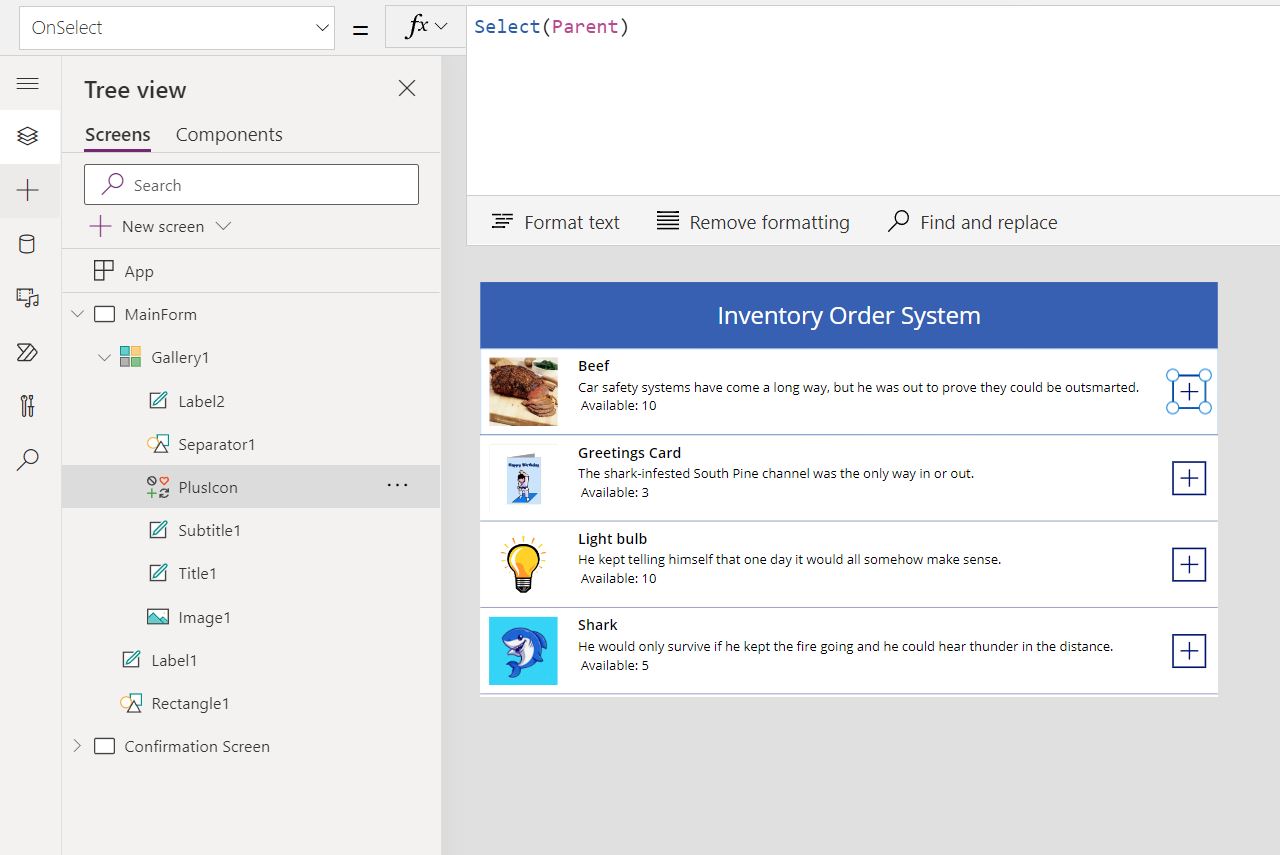
Kindly add the following code for OnSelect
Clear(TempQuantityTable); // We will use 'Confirmation Screen' to our dropdown later in our 'Confirmation Screen'ForAll(FirstN([1, 2, 3, 4, 5, 6, 7, 8, 9, 10], ThisItem.'Current Qty'),Collect(TempQuantityTable,Text(Value))); //Since PowerApps doesnt have a for loop, we need to create an item from 1 - Avaialble Quantity of that itemClearCollect(TempSelectedItem, ThisItem); //Passing the Whole row to our Confirmation ScreenNavigate('Confirmation Screen')
Now let’s go back to our Confirmation Screen and use “TempSelectedItem” to populate our label
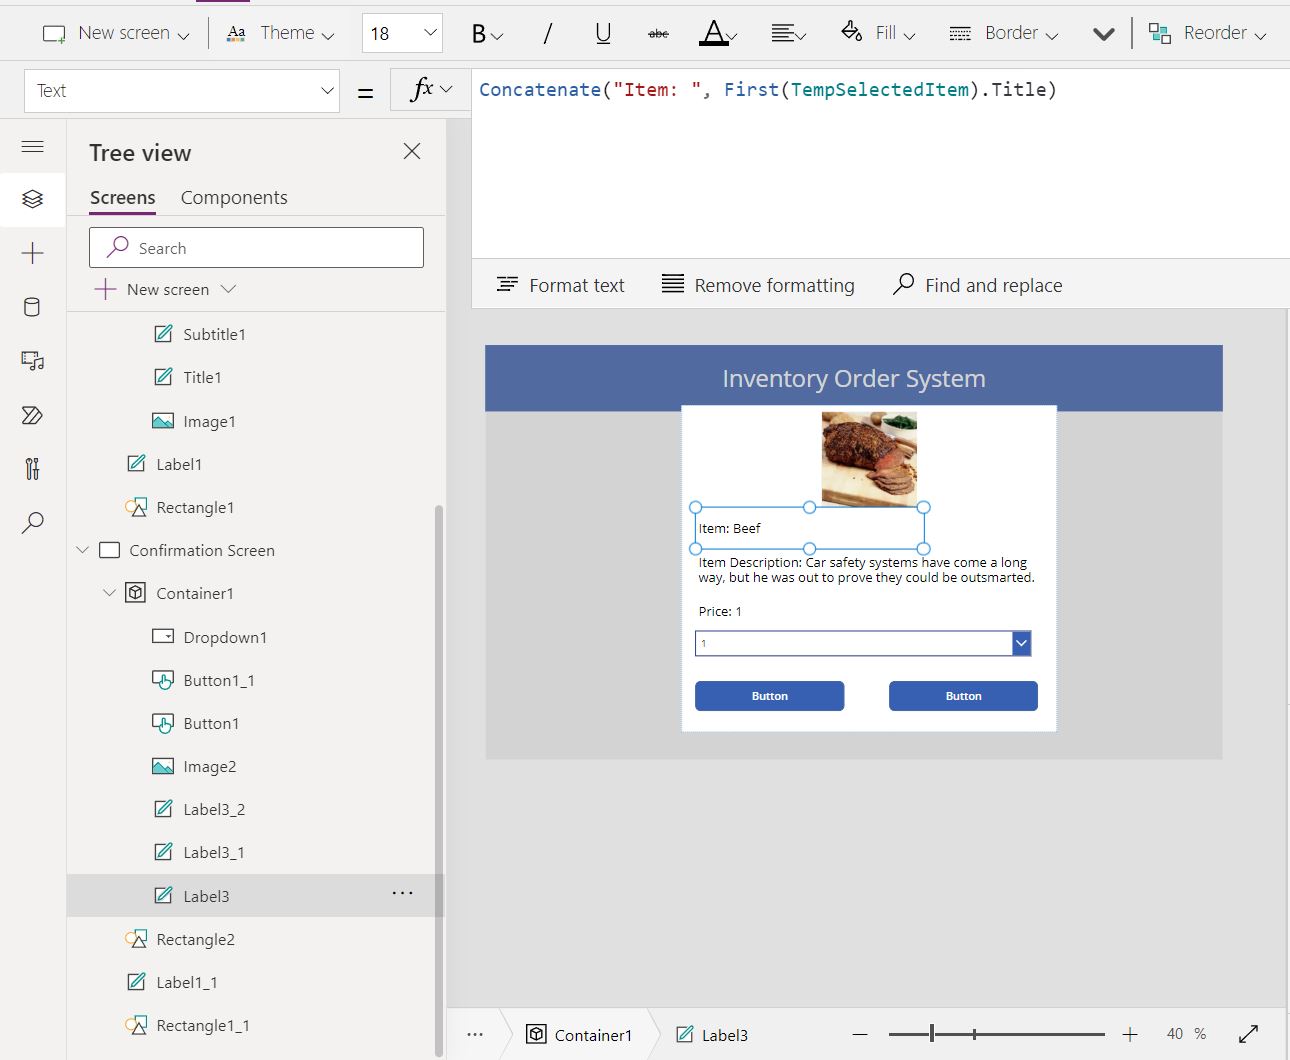
For our Dropdown List, we need to change the item property with our “TempQuantityTable”

Now let’s change the button in our “Confirmation Screen”
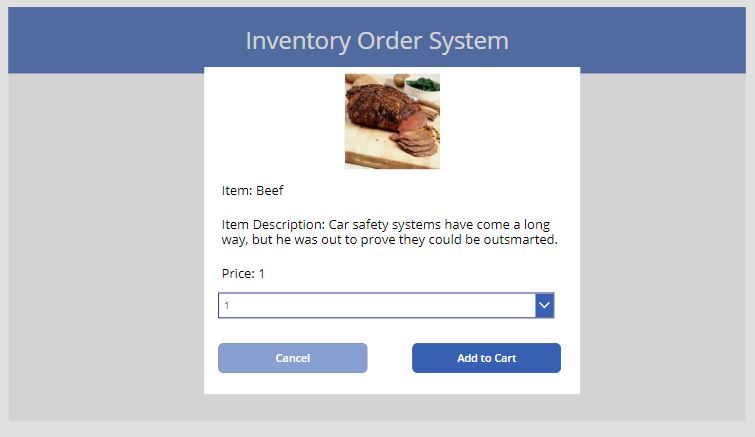
Now let’s change the button in our “Confirmation Screen”
// We will use the Collection named "CartTable" to store our ordersIf(IsBlank(LookUp(CartTable,ID = First(TempSelectedItem).ID).ID)//Check First if the item we added to cart exists in "CartTable" collection.,Collect(CartTable,{Item: First(TempSelectedItem),Quantity: DDLQuantity.SelectedText.Value,ID: First(TempSelectedItem).ID,Subtotal: Sum(TempSelectedItem,Price * DDLQuantity.SelectedText.Value)})//If it doesnt exists add it to the "CartTable" Collection,UpdateIf(CartTable,ID = First(TempSelectedItem).ID,{Item: First(TempSelectedItem),Quantity: DDLQuantity.SelectedText.Value,ID: First(TempSelectedItem).ID,Subtotal: Sum(TempSelectedItem,Price * DDLQuantity.SelectedText.Value)})//If its already existing we just need to update that item in the Cart);Navigate(MainForm);//After updating the "CartTable" Collection we go back to our MainForm
Now let’s add a Shopping Cart icon on the top right part of our Application and then add a label show how many we are adding our Cart
Now let’s add a new Screen and let’s call it “Check Out Screen”.
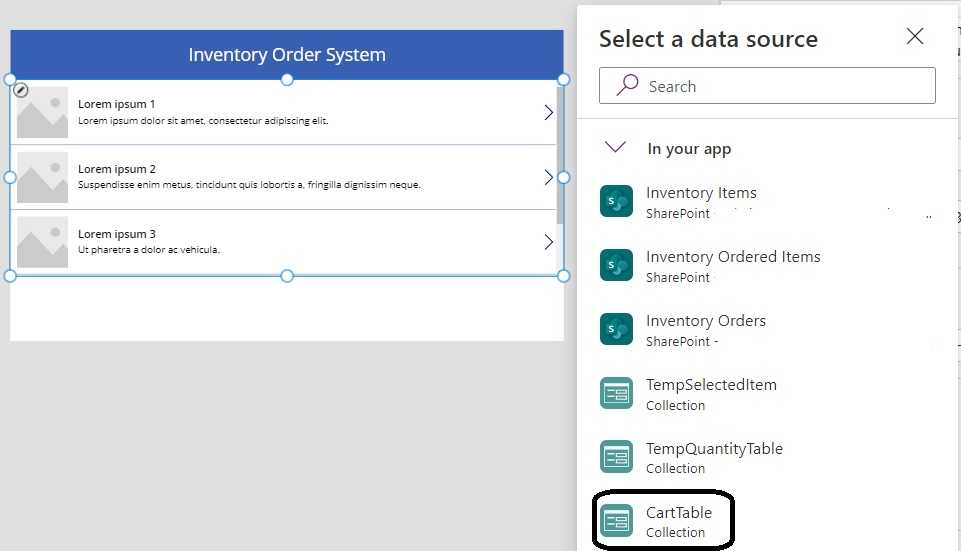
In the “Check Out Screen” let’s now add a Vertical Gallery then connect it to our “CartTable” Connection
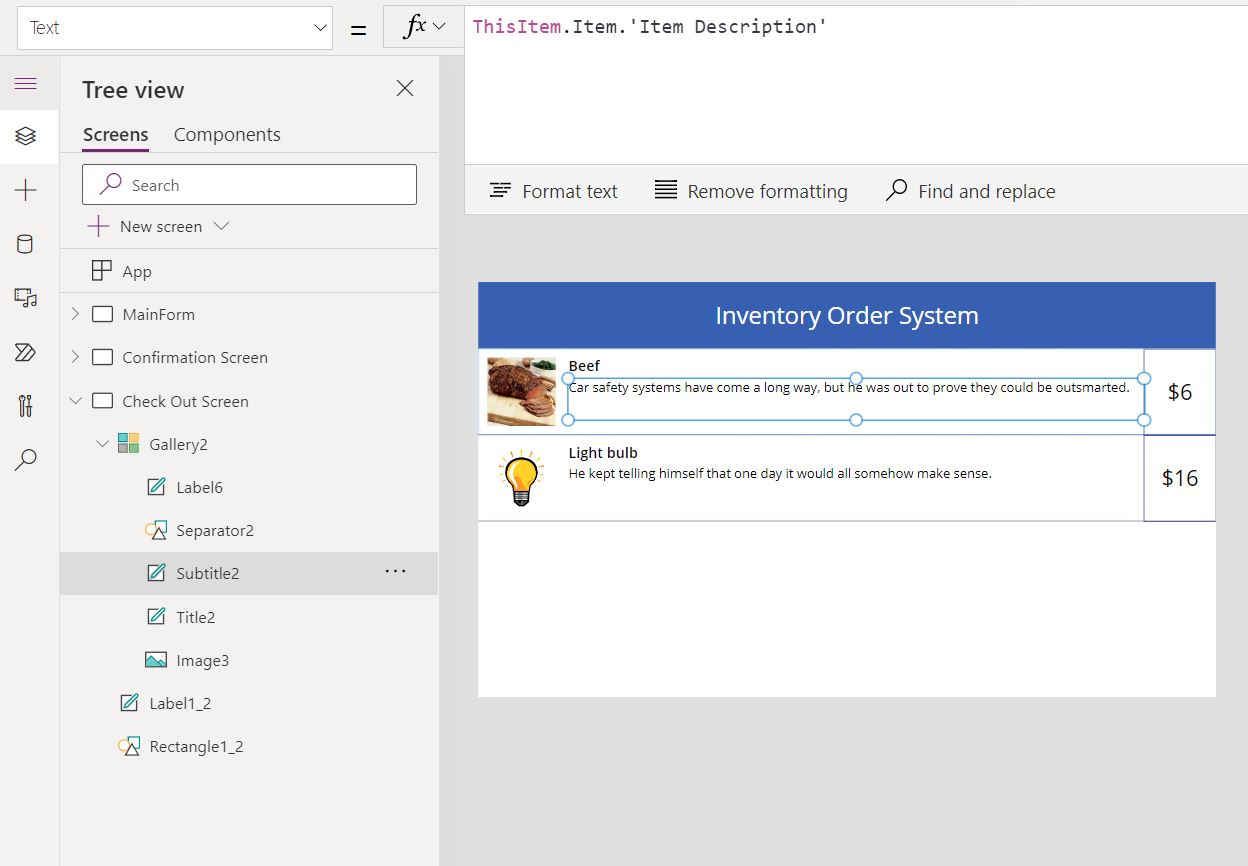
Let connect to item in our new Gallery to our “CartTable” properties
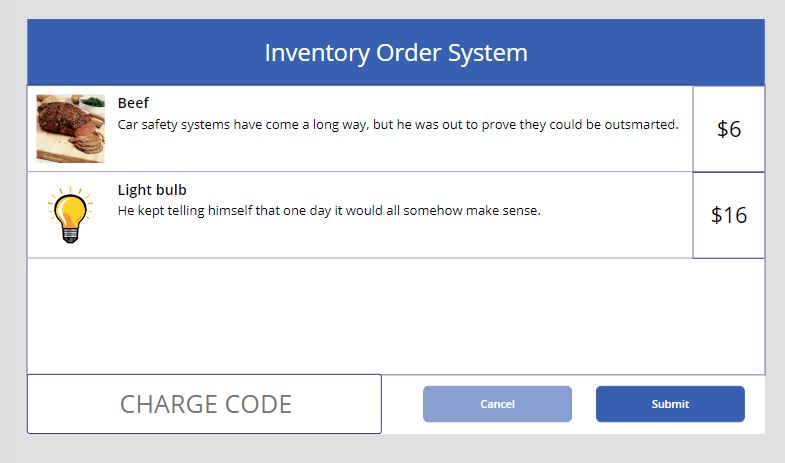
Now let’s add a “Text Input” for entering “Charge Code” and buttons for Submit and Cancel
Now let’s change our submit button that will save our data to our SharePoint Lists
ClearCollect(NewStoresOrderID,Patch('Inventory Orders',Defaults('Inventory Orders'),{Title: TextInput1.Text,'Charge Code': TextInput1.Text,'Order Totals': Sum(CartTable,Subtotal)}));//This is to save item in the 'Inventory Orders' and save the item information of the new item created in NewStoresOrderIDForAll(CartTable,Patch('Inventory Ordered Items',{Title: ThisRecord.Item.'Item Description',Qty: Value(ThisRecord.Quantity),OrderID:{Id: First(NewStoresOrderID).ID,Value: First(NewStoresOrderID).Title,'@odata.type': "#Microsoft.Azure.Connectors.SharePoint.SPListExpandedReference"},//Since this is a look up field we need to provide an object with the following properties to itItemID:{Id: ThisRecord.Item.ID,Value: ThisRecord.Item.Title,'@odata.type': "#Microsoft.Azure.Connectors.SharePoint.SPListExpandedReference"},//Since this is a look up field we need to provide an object with the following properties to itSubtotal: ThisRecord.Subtotal}));
let’s now try Submit
This should create an item in “Inventory Orders” and in “Inventory Ordered Items” list