Fix Power Automate Instant Cloud Flow in Non-Default Environments
Billy Peralta
November 6, 2023

Introduction
Have you encountered an issue in Power Automate where your instant cloud flow, triggered by “For a selected file” or “For a selected item” deployed in a non-default environment, doesn’t show up in SharePoint? You’re not alone. This known bug has been reported since January 5, 2022, and unfortunately, there have been no updates to resolve it.
The Challenge
The main problem with this bug is that if your workflow is triggered by “For a selected file” or “For a selected item,” you won’t be able to use your non-default environment to host your workflow. This limitation means you won’t have the flexibility to have separate environments for testing or development.
Solution
To address this issue, follow these steps:
Prerequisites
- In your SharePoint list/library, add a new column (it doesn’t matter what column type you choose, but for this guide, we will use a single-line text column).
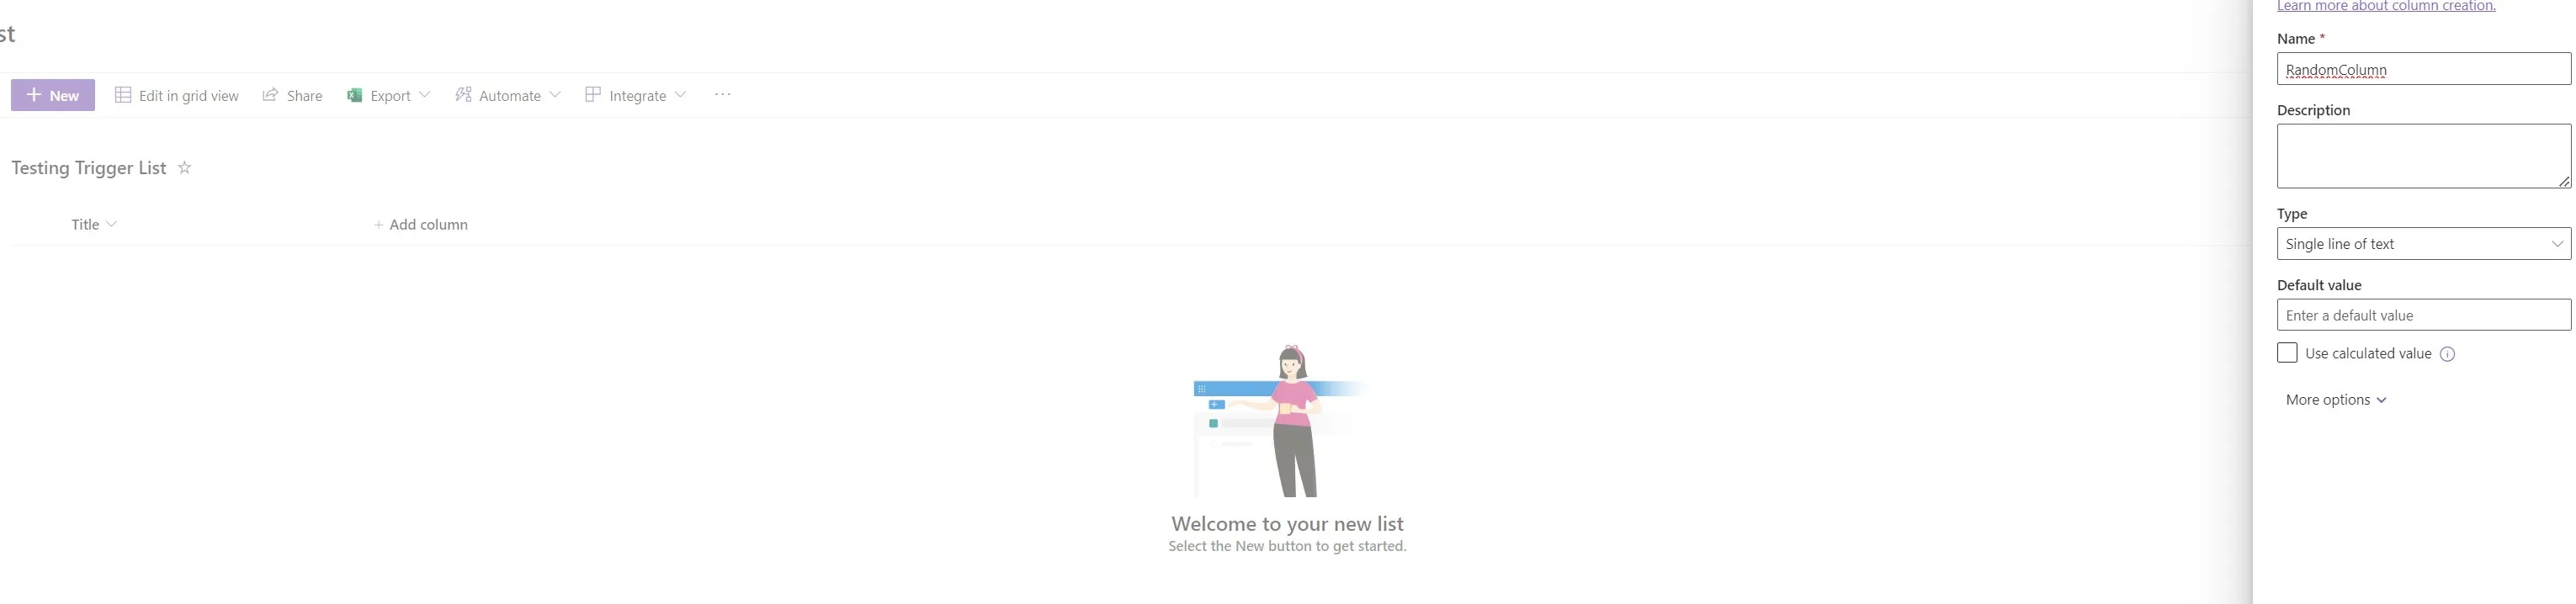
- Once the column is added, you need to edit the formatting of the column you just added.
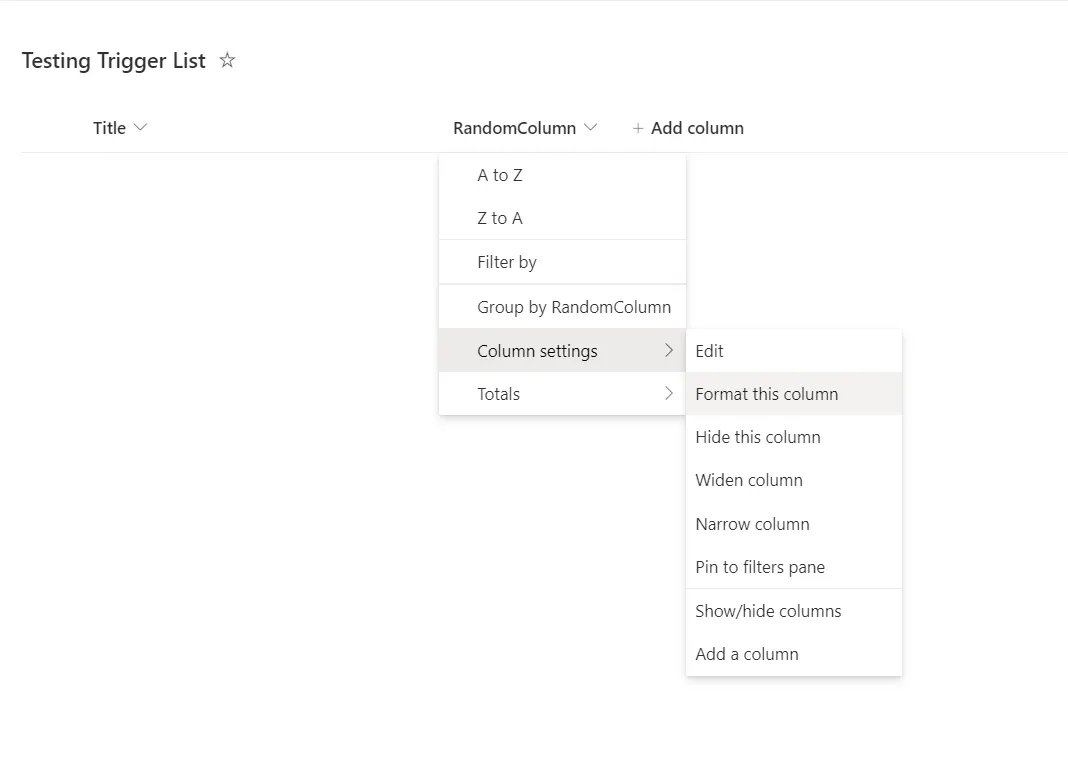
Changing the Format of the Column
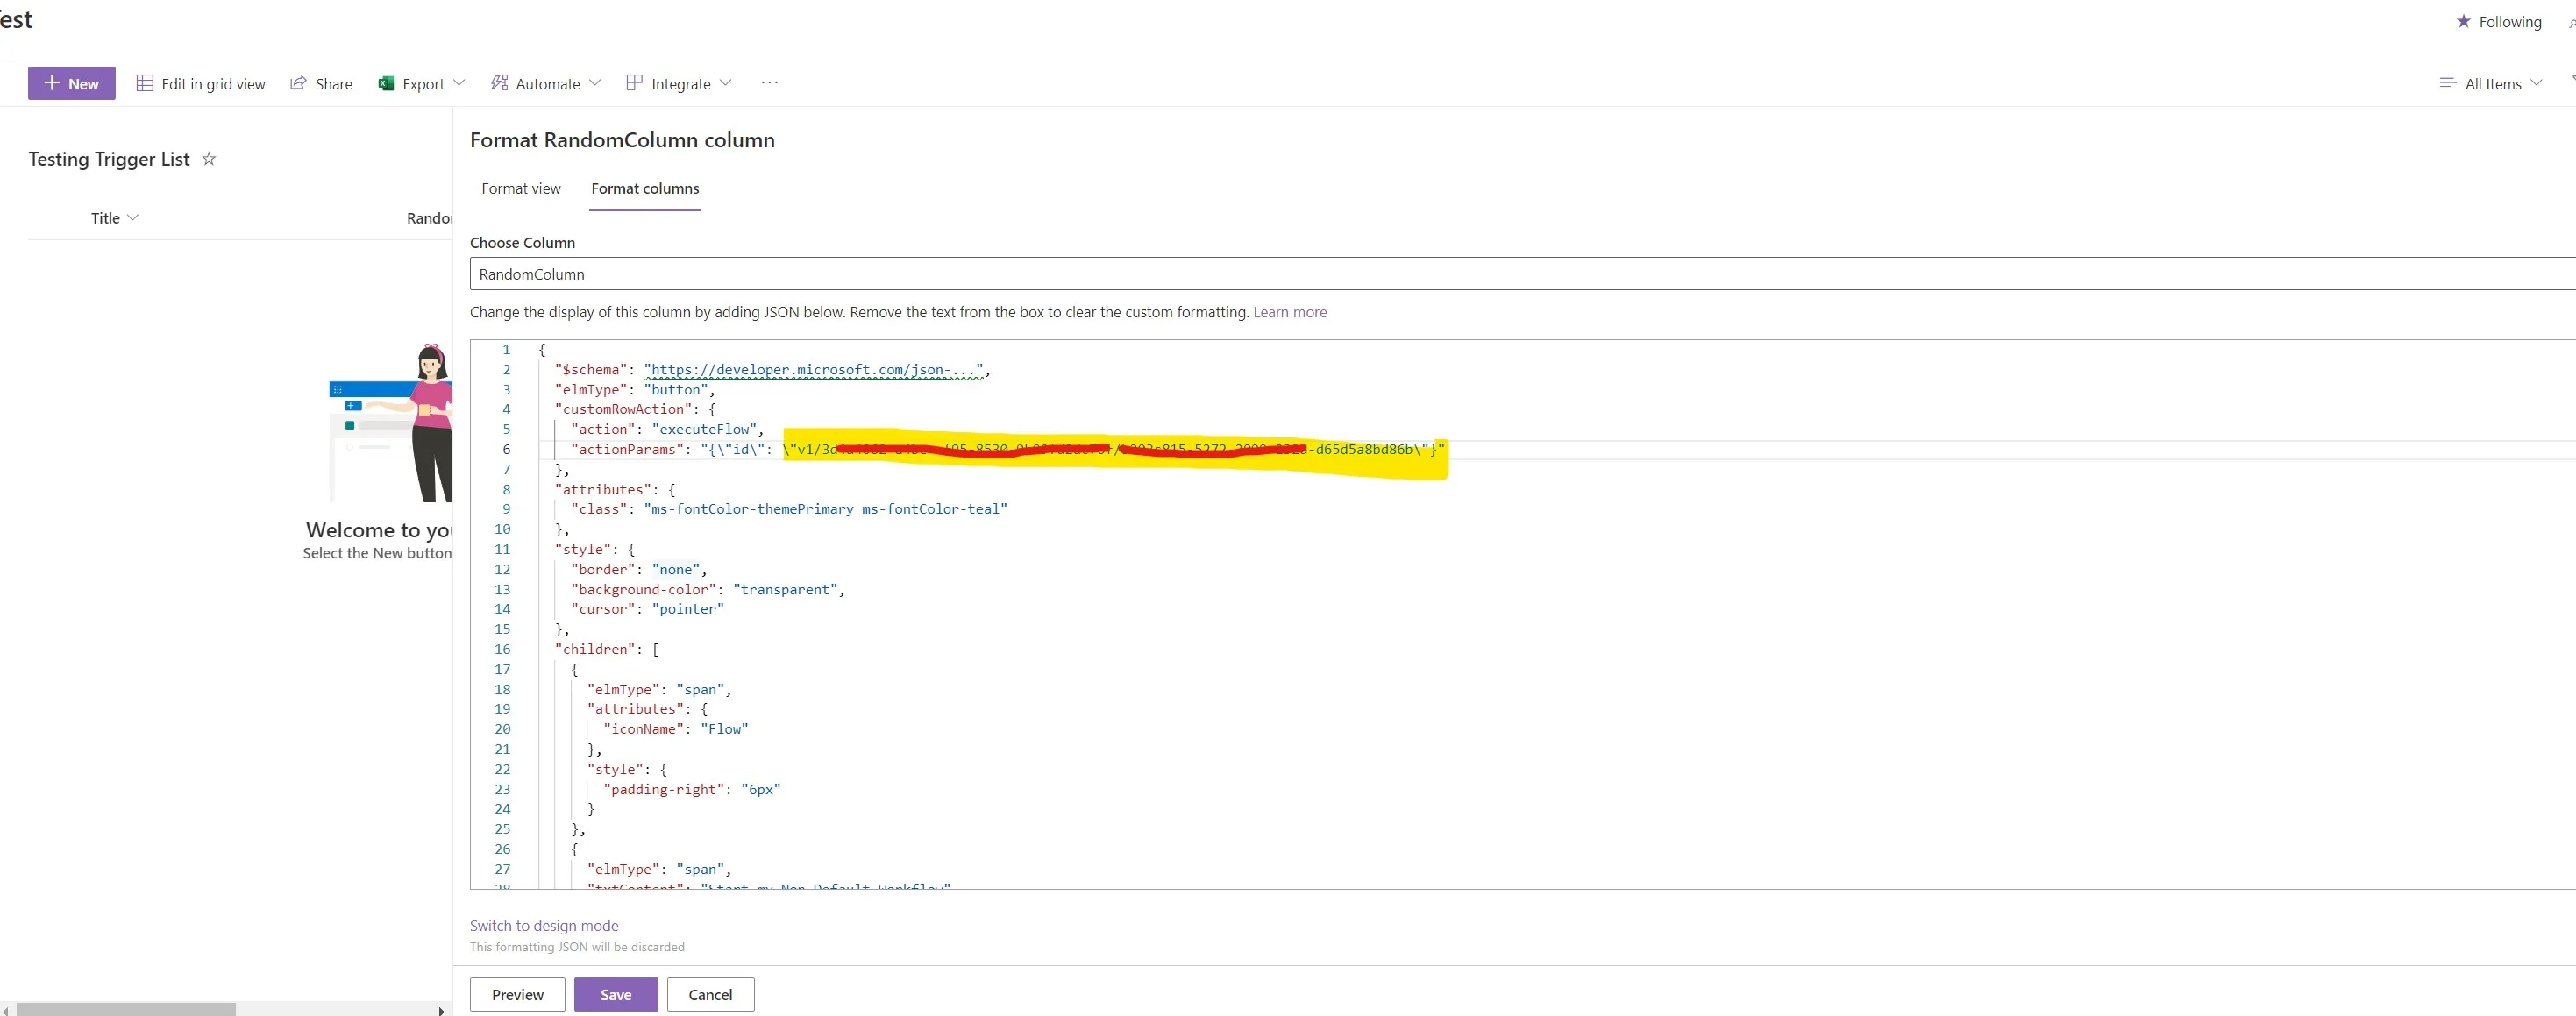
- Click on “Advance mode.”
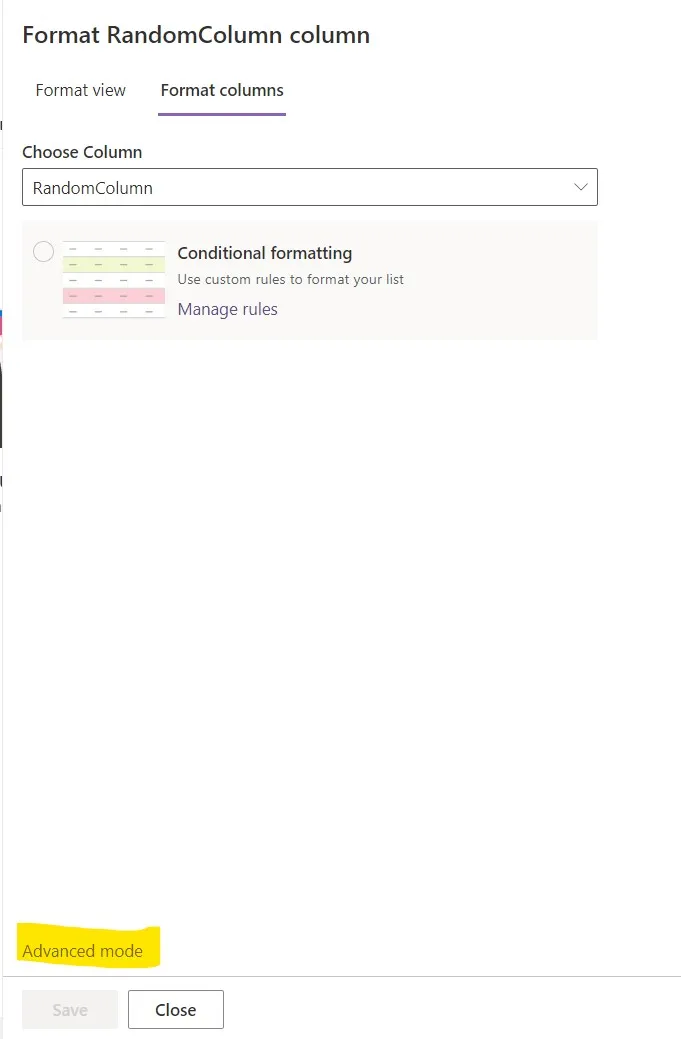
- In Advance mode, you will be able to add JSON Formatting to your column. Insert the following code::
"$schema": "https://developer.microsoft.com/json-schemas/sp/v2/column-formatting.schema.json",
"elmType": "button",
"customRowAction": {
"action": "executeFlow",
"actionParams": "{\"id\": \"[ENTER WORKFLOW IDENTIFIER HERE]\"}"
},
"attributes": {
"class": "ms-fontColor-themePrimary ms-fontColor-teal"
},
"style": {
"border": "none",
"background-color": "transparent",
"cursor": "pointer"
},
"children": [
{
"elmType": "span",
"attributes": {
"iconName": "Flow"
},
"style": {
"padding-right": "6px"
}
},
{
"elmType": "span",
"txtContent": "Start my Non Default Workflow"
}
]
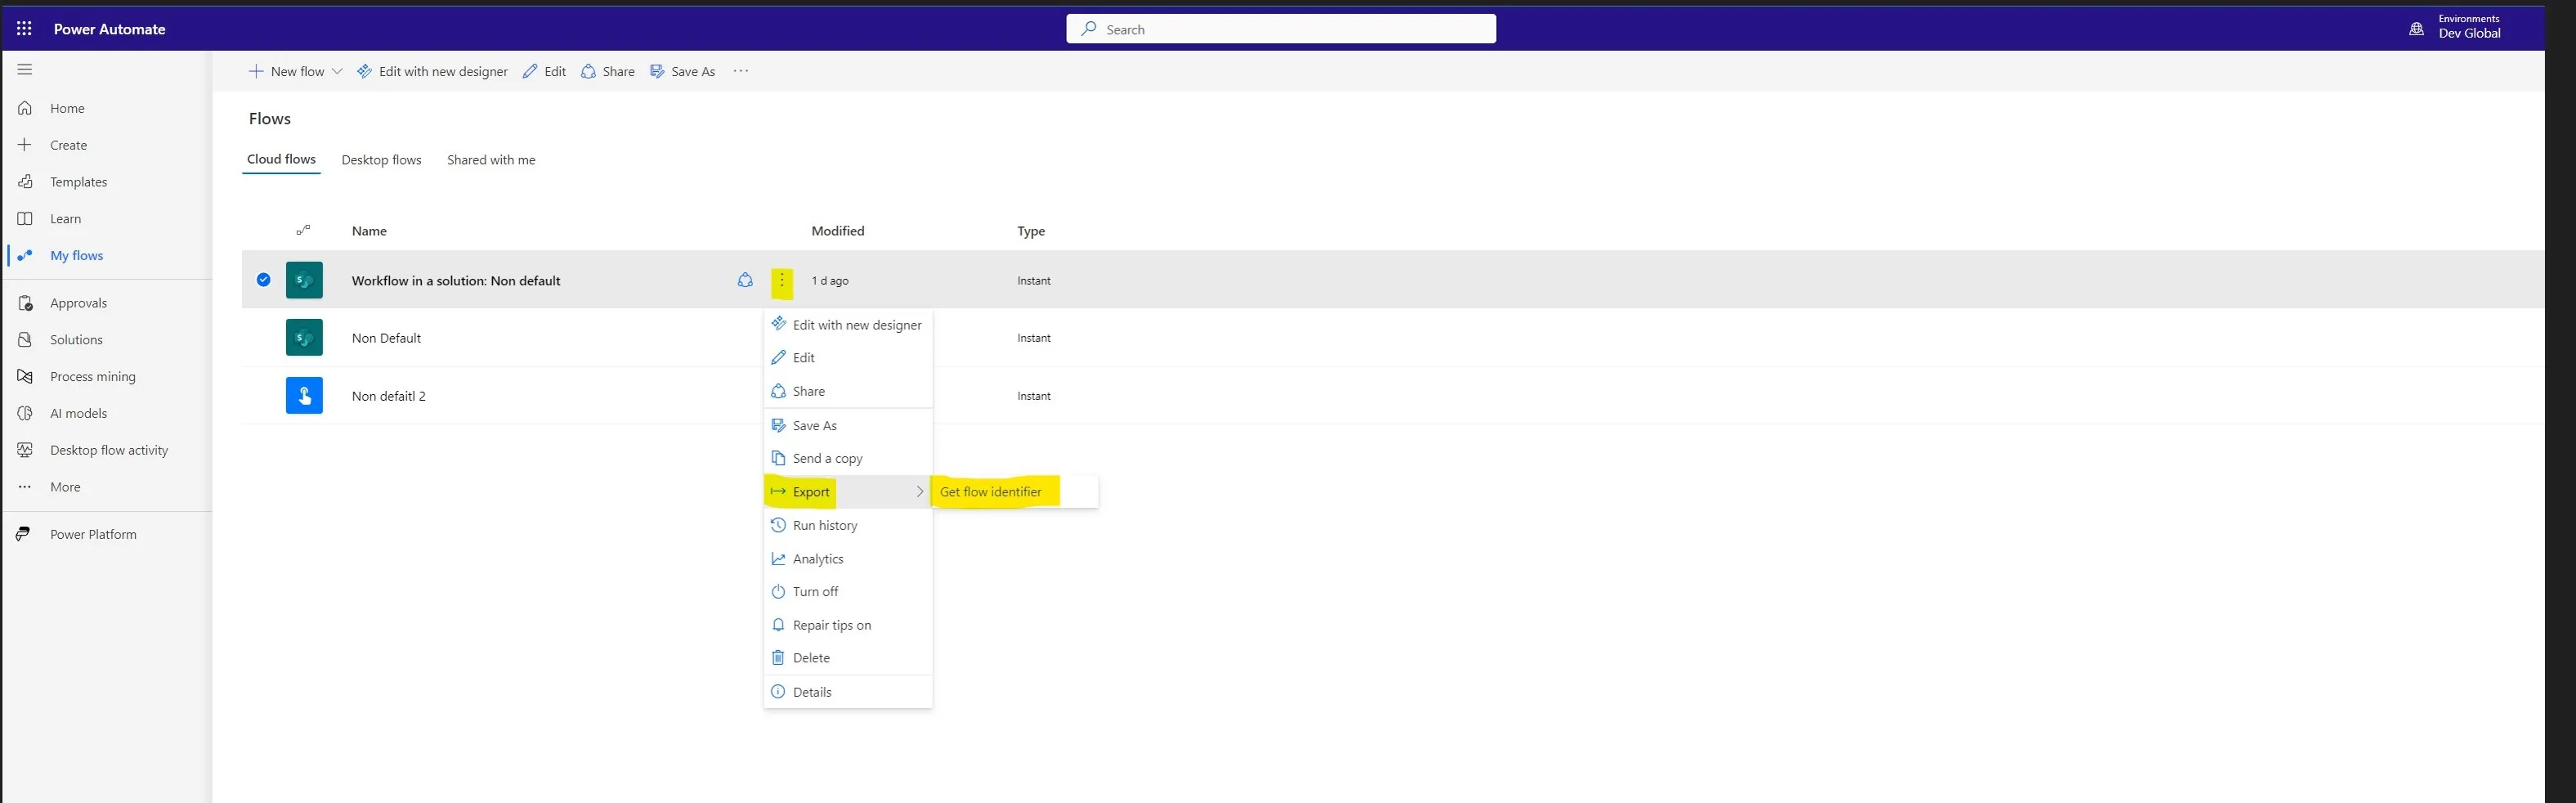
}Replace [ENTER WORKFLOW IDENTIFIER HERE] with your own workflow identifier, which you can find on the Power Automate page.
Note: This example uses one of my workflows deployed to my non-default development environment.
Changing the Format of the Column
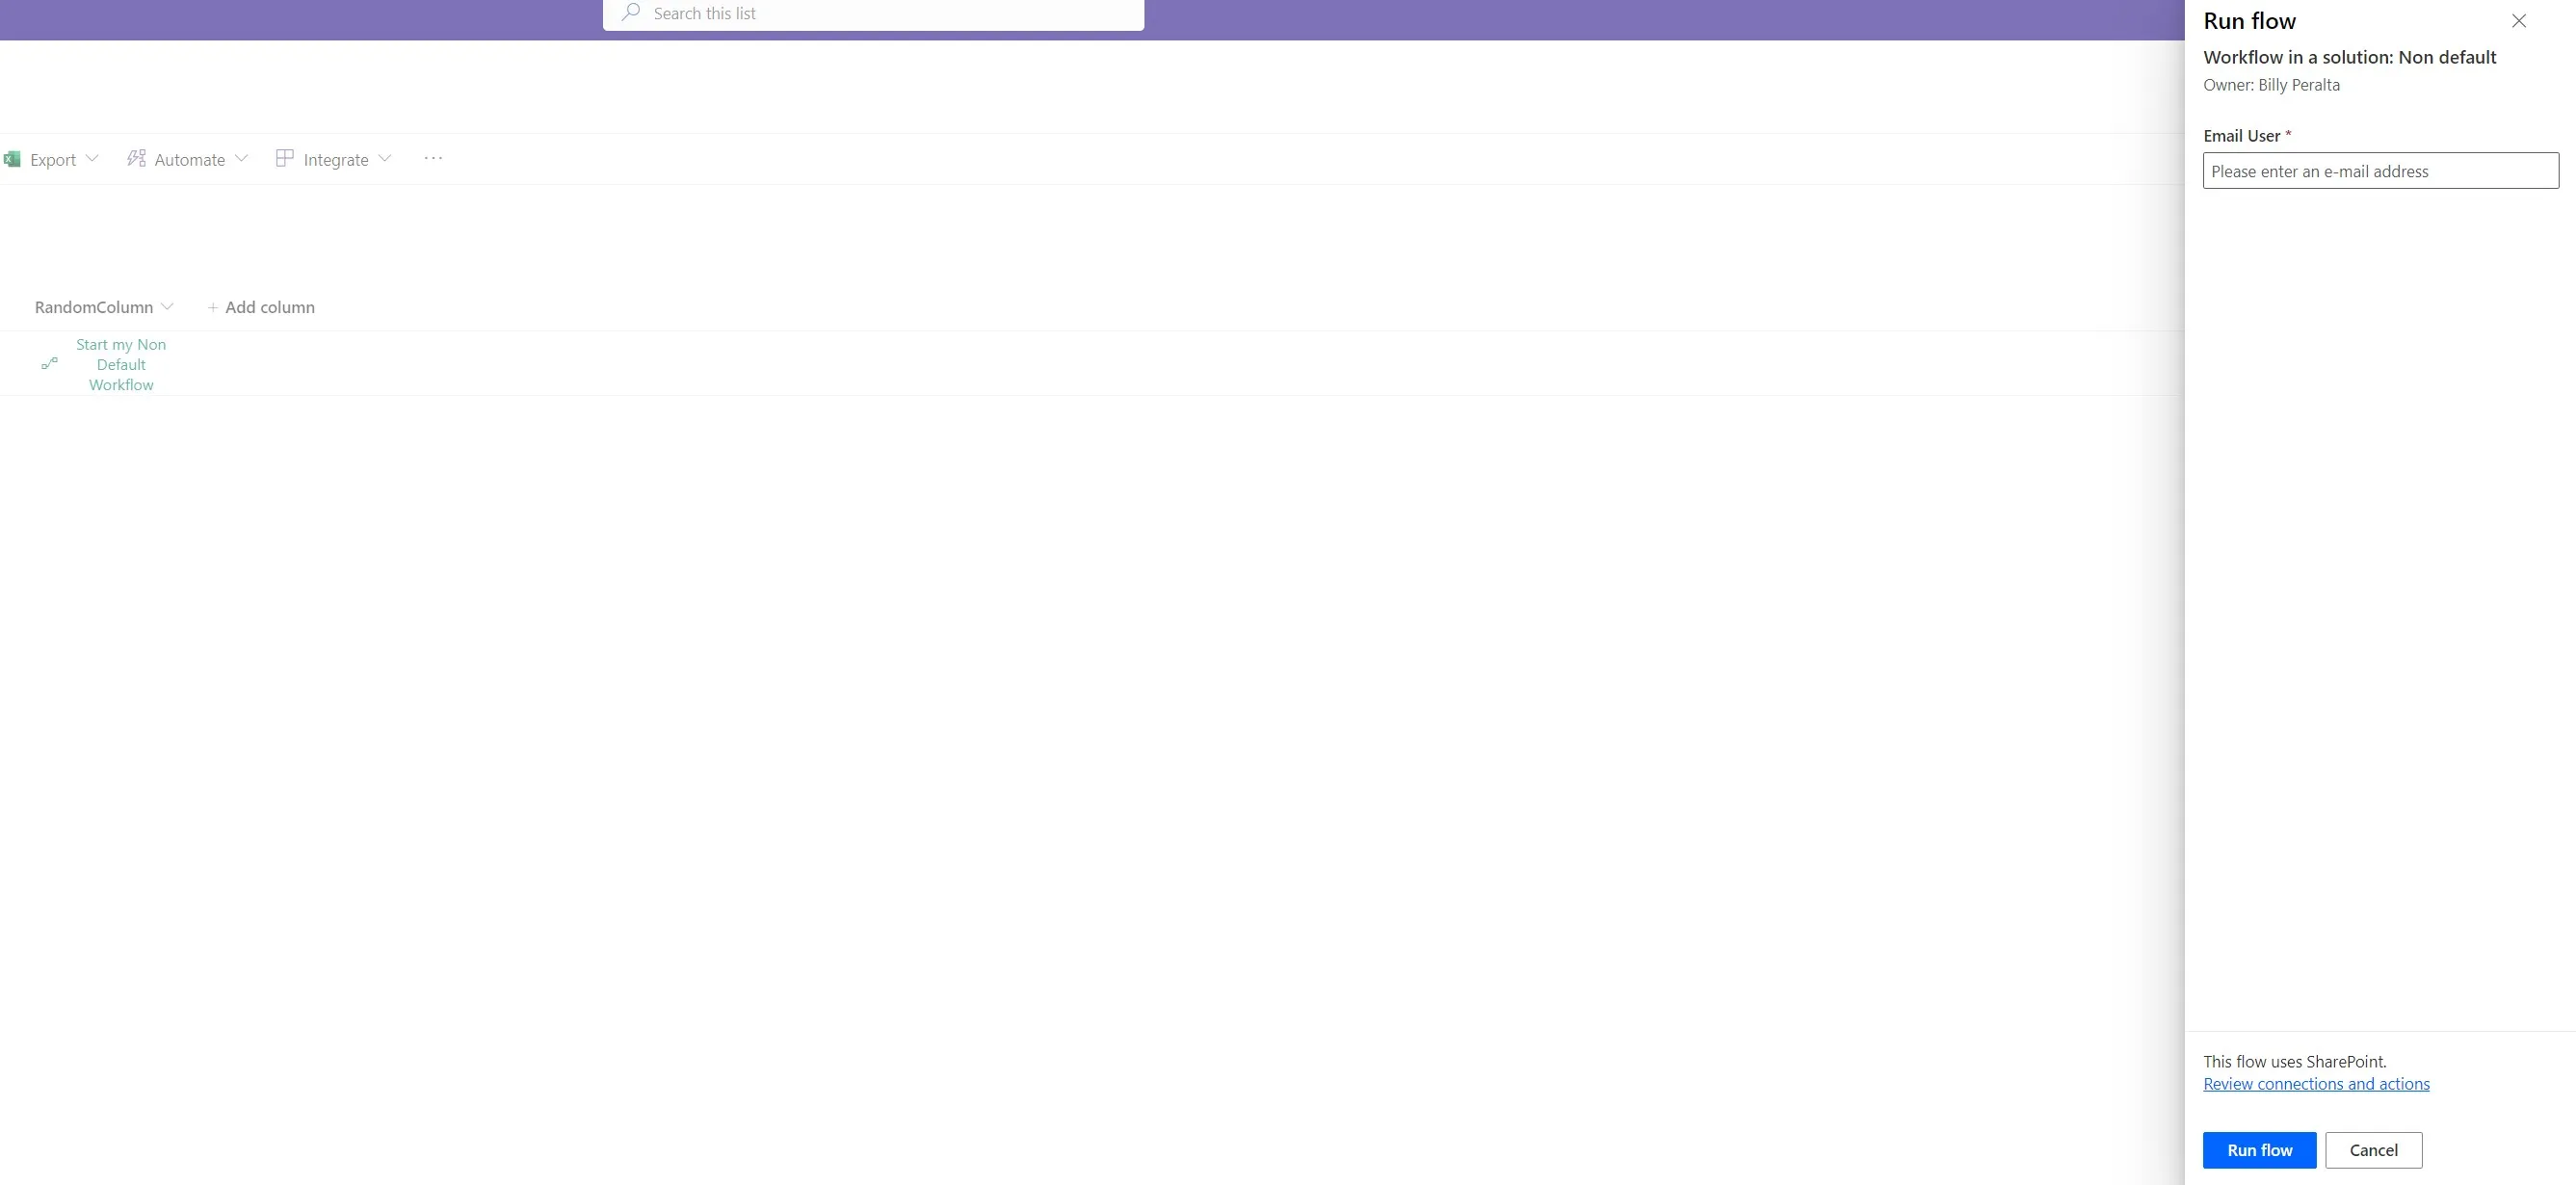
- Once youve pasted the JSON format, your column should look like this:
- Dont forget to save your changes and try the workflow. Since the workflow may require an email input, here’s how it should look:
Need help building or stabilizing Power Apps connected to SharePoint?
I help organizations design Power Apps and Power Automate solutions that are maintainable, governed, and easier to support after launch.
Billy Peralta
SharePoint & Microsoft 365 Specialist • 16+ Years Experience
If you have questions about your SharePoint environment, feel free to reach out.
Need help building or stabilizing Power Apps connected to SharePoint?
I help organizations design Power Apps and Power Automate solutions that are maintainable, governed, and easier to support after launch.