How to Recreate SharePoint Content Organizer Using Power Automate
Billy Peralta
March 21, 2021

Content Organizer is a feature in SharePoint that allows the end-user to create rules that will help the team automatically organize their files based on the conditions/rules created.
Since in SharePoint Online, the “Incoming Email” feature that we enjoy in SharePoint 2016, 2013, 2010 is no longer available. This guide will show you how to recreate that feature through Power Automate in SharePoint Online.
Create a shared mailbox
First, we will create a shared mailbox in M365/O365 that we can use in our PowerAutomate later.
-
Let go to our Admin Center
-
Go to Groups > ‘Shared mailboxes’ page > ‘Add a shared mailbox.’
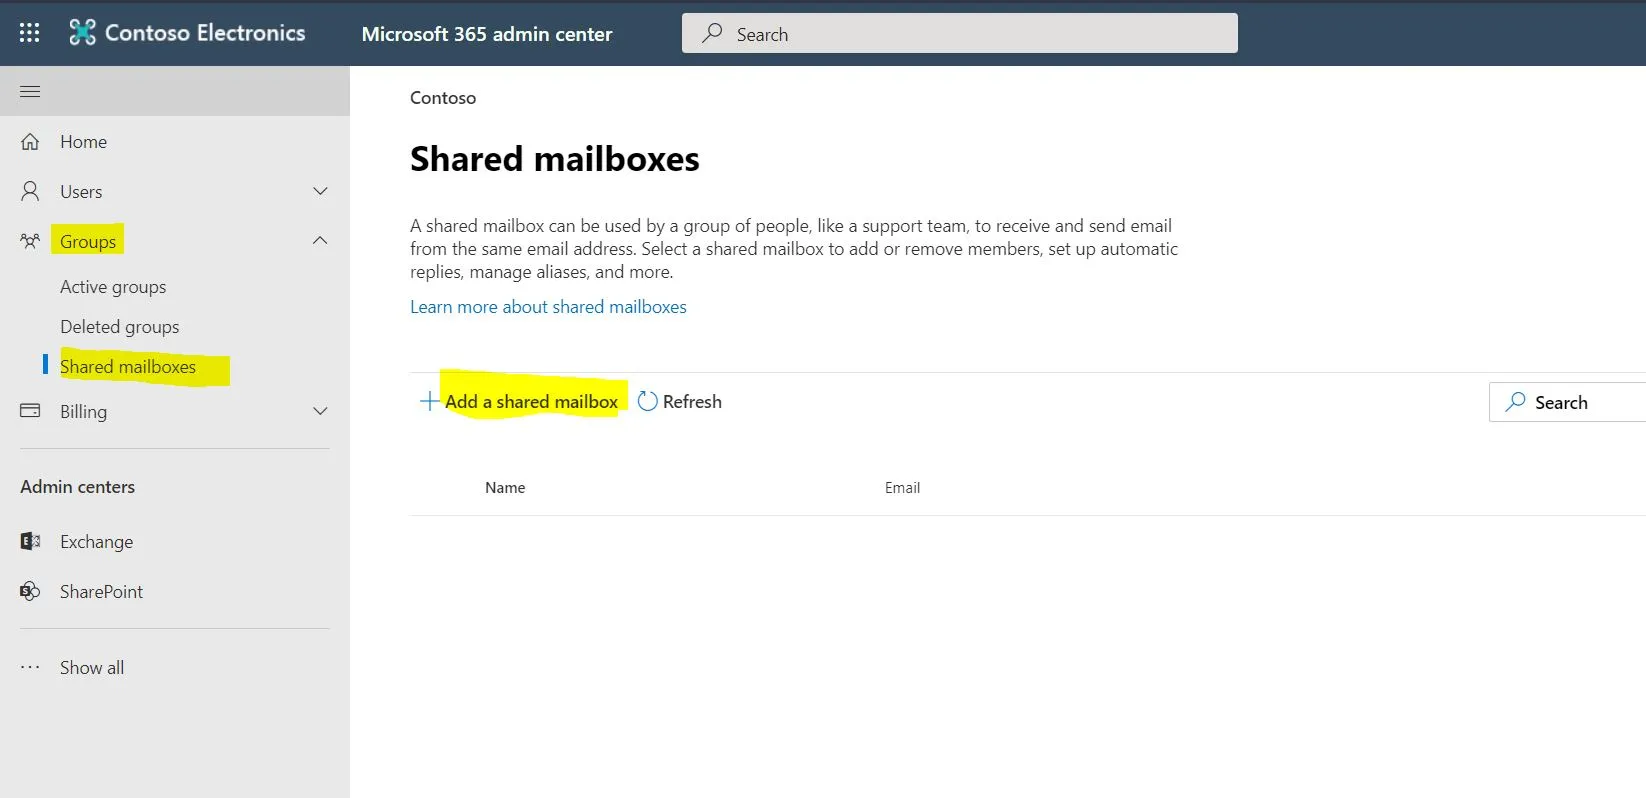
- Fill in the Name of the Shared mailbox and then the email address you like. Then Hit ‘Save Changes’

Enabling of ‘Content Organizer’ in our Site Collection.
-
Let’s now go to our Site Collection, and we will need to enable the Content Organizer Feature
-
Site settings > Manage site features > Content Organizer > Activate
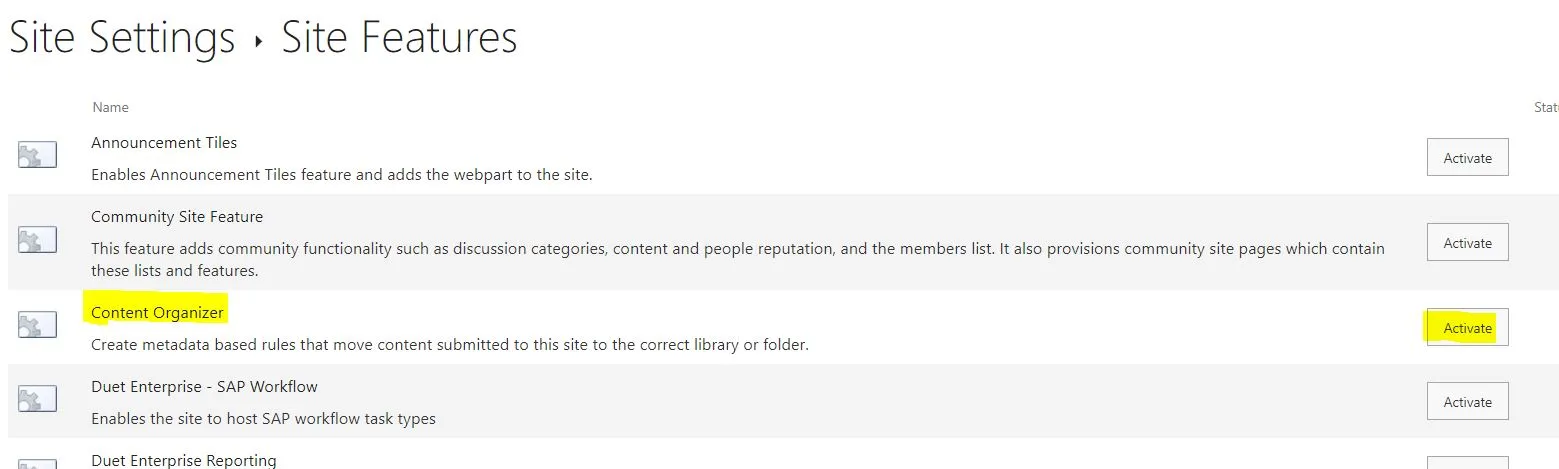
Note: that you might encounter this error when enabling
“The Site scoped feature being activated has a dependency on hidden Site Collection scoped feature ‘FeatureDefinition/15/0c8a9a47-22a9-4798-82f1-00e62a96006e’ (ID: ‘0c8a9a47-22a9-4798-82f1-00e62a96006e’). Hidden features cannot be auto-activated across scopes. There may be one or more visible Site Collection scoped features that auto-activate the dependent hidden feature.”
To fix this error, you will need to enable first “SharePoint Server Standard Site Collection features” and “SharePoint Server Enterprise Site Collection features” first. Both can be found in the “Site Collection Features” in the “Site Settings.”
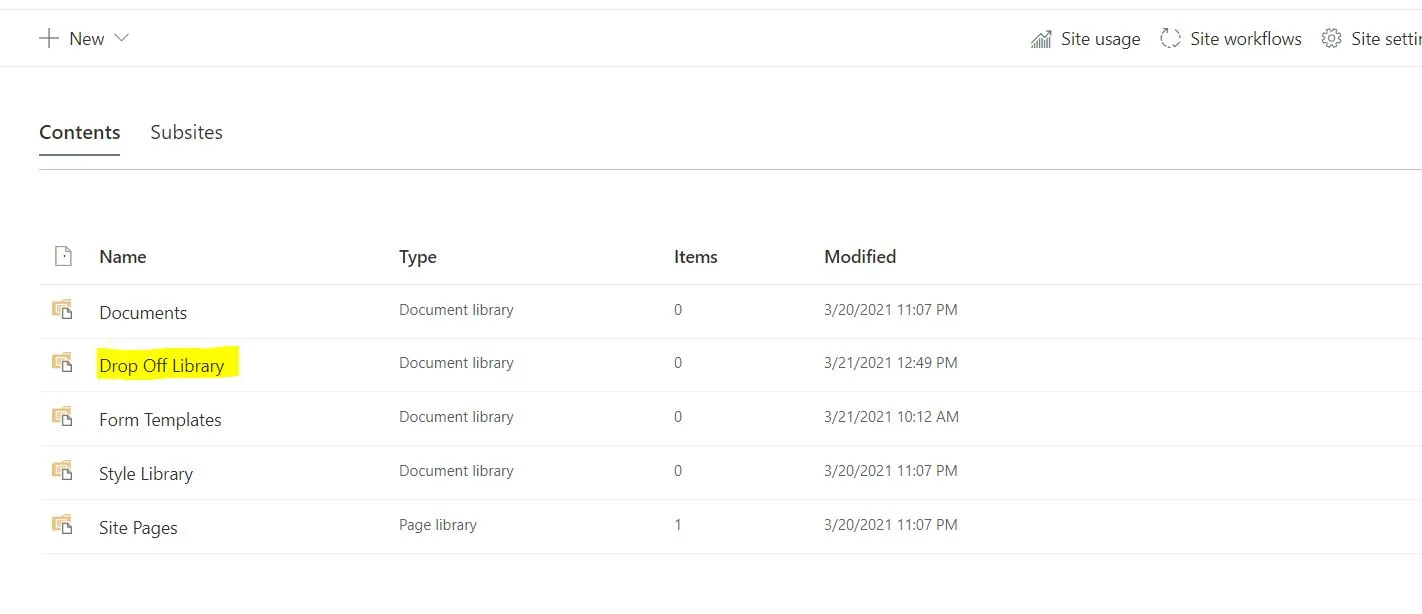
- Once the Content Organizer is activated, it will create a “Drop Off Library.”
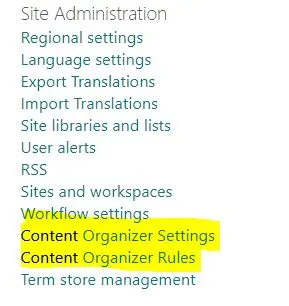
- It will also add two new options under the Site Settings > Site Administration
-
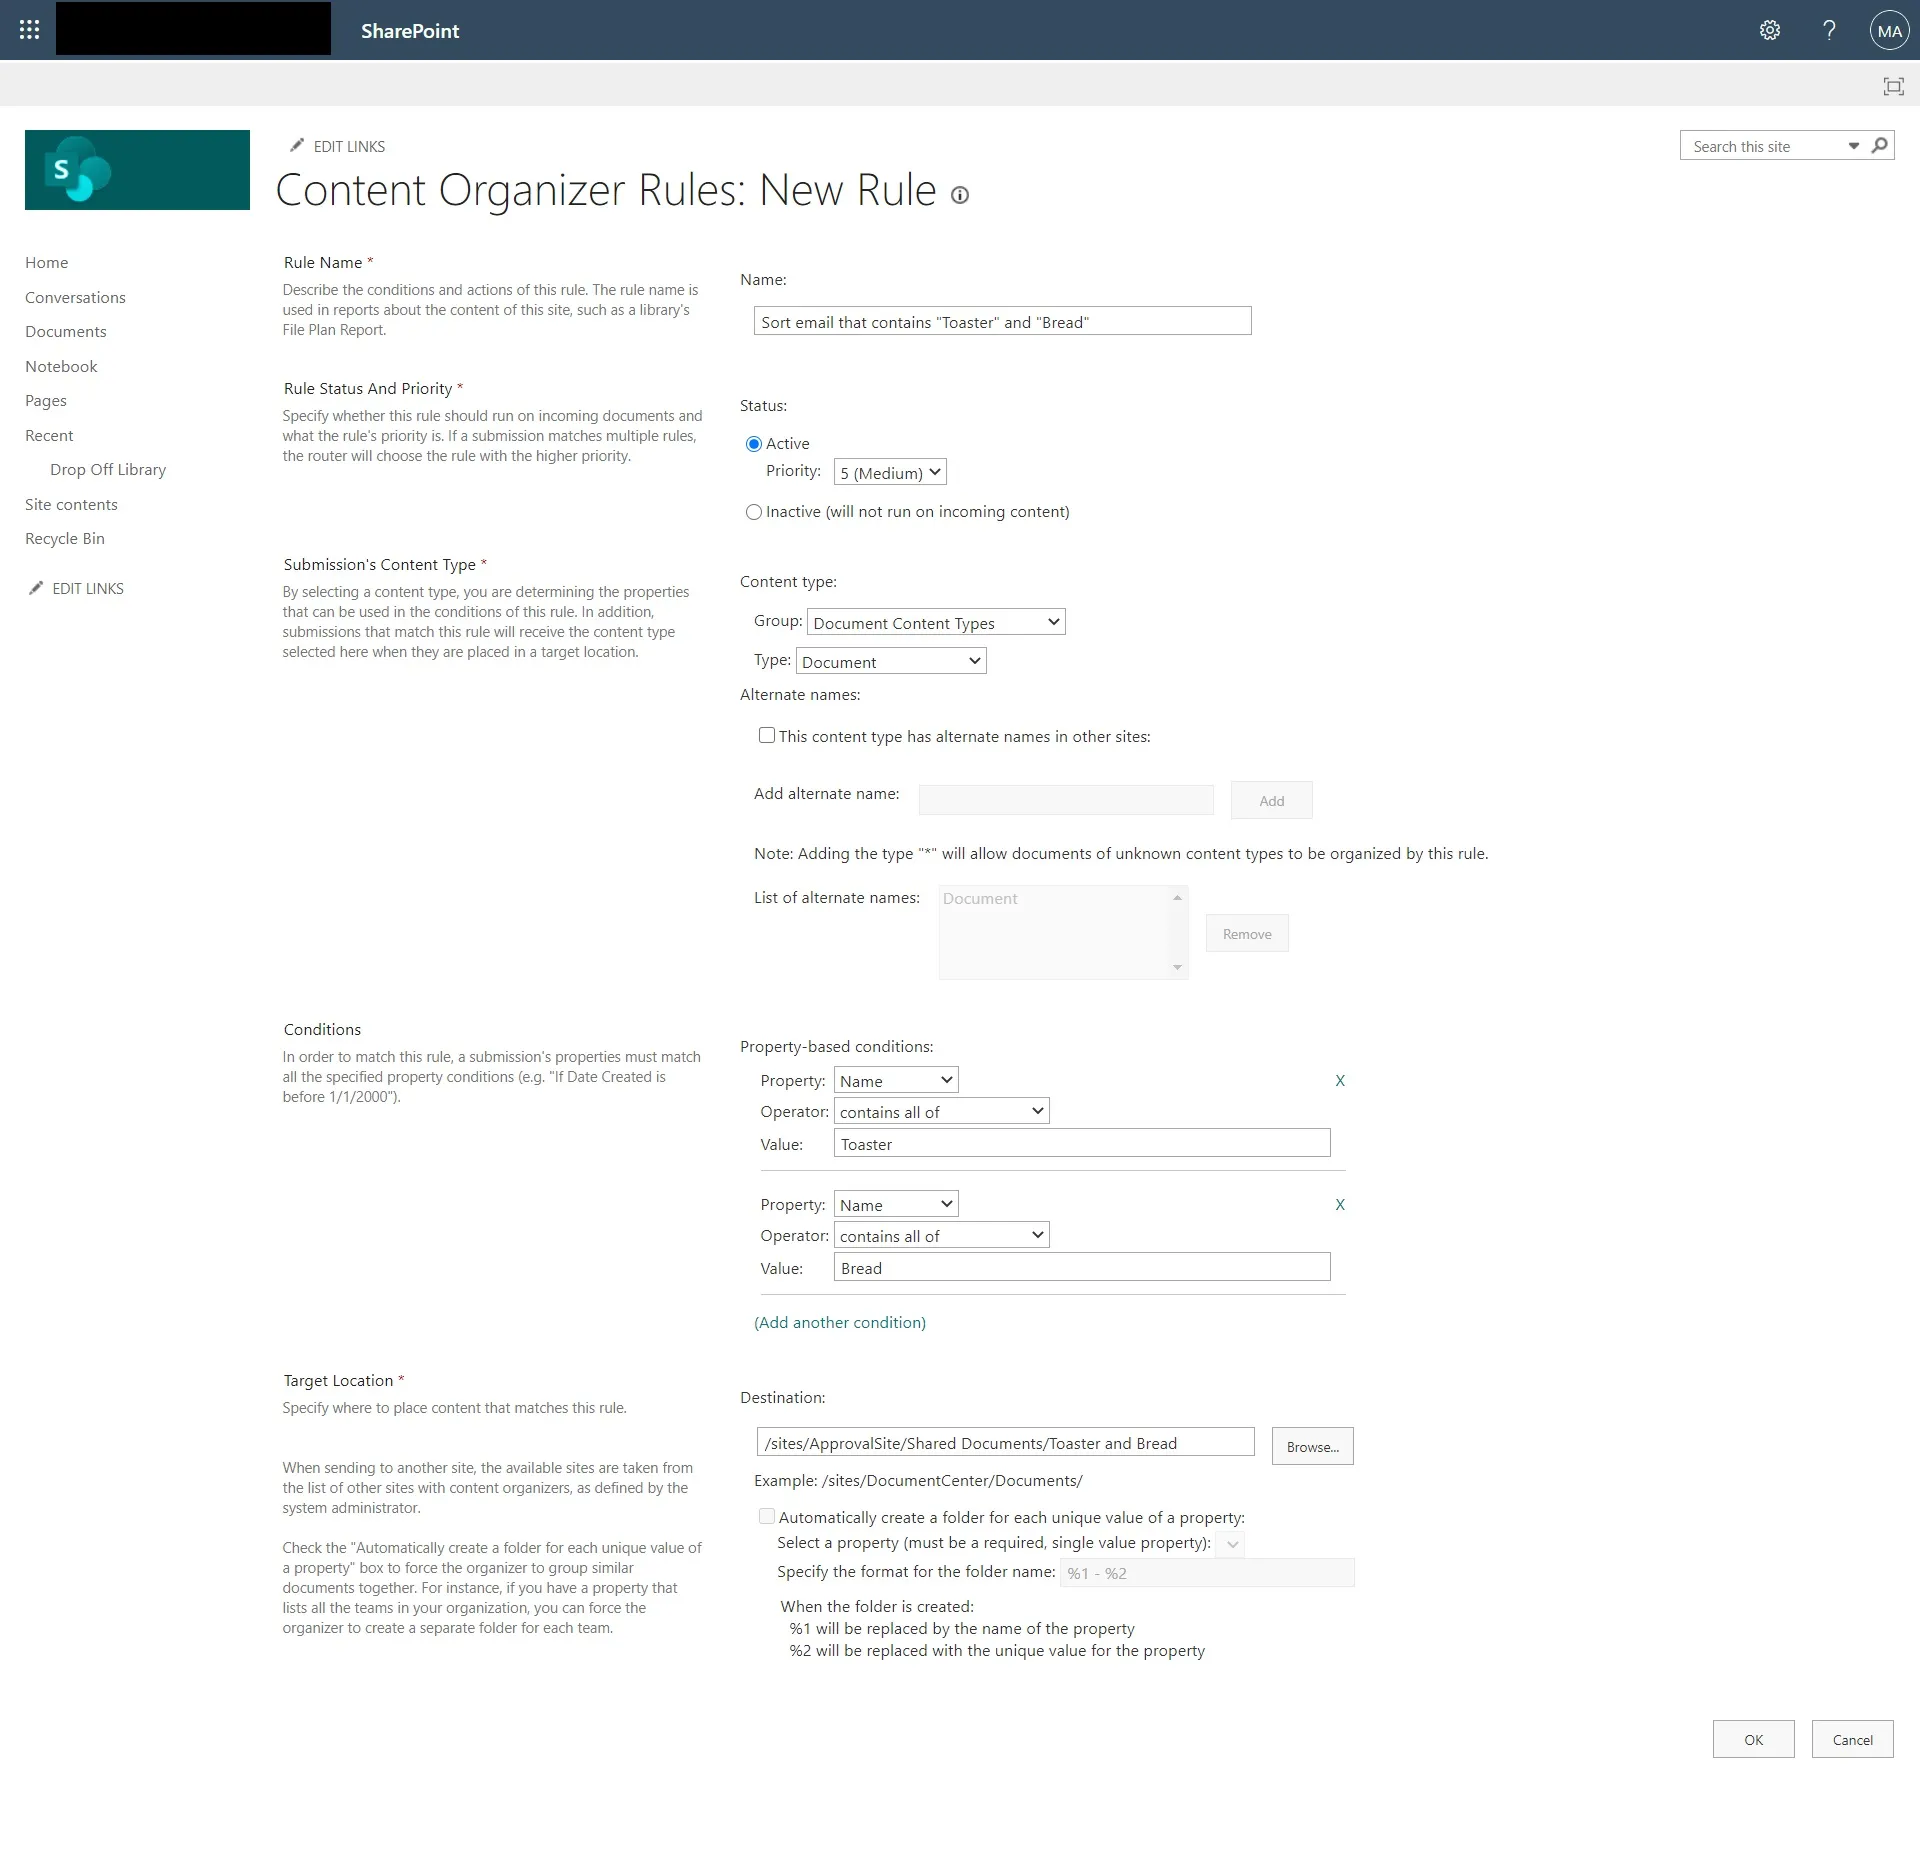
Now, we will add a new rule to sort our Emails. We can do that by going Site Settings > Content Organizer Rules then pressing “New.”
-
Fill in the necessary information with the following information
Creating Power Automate that uses Content Organizer rules
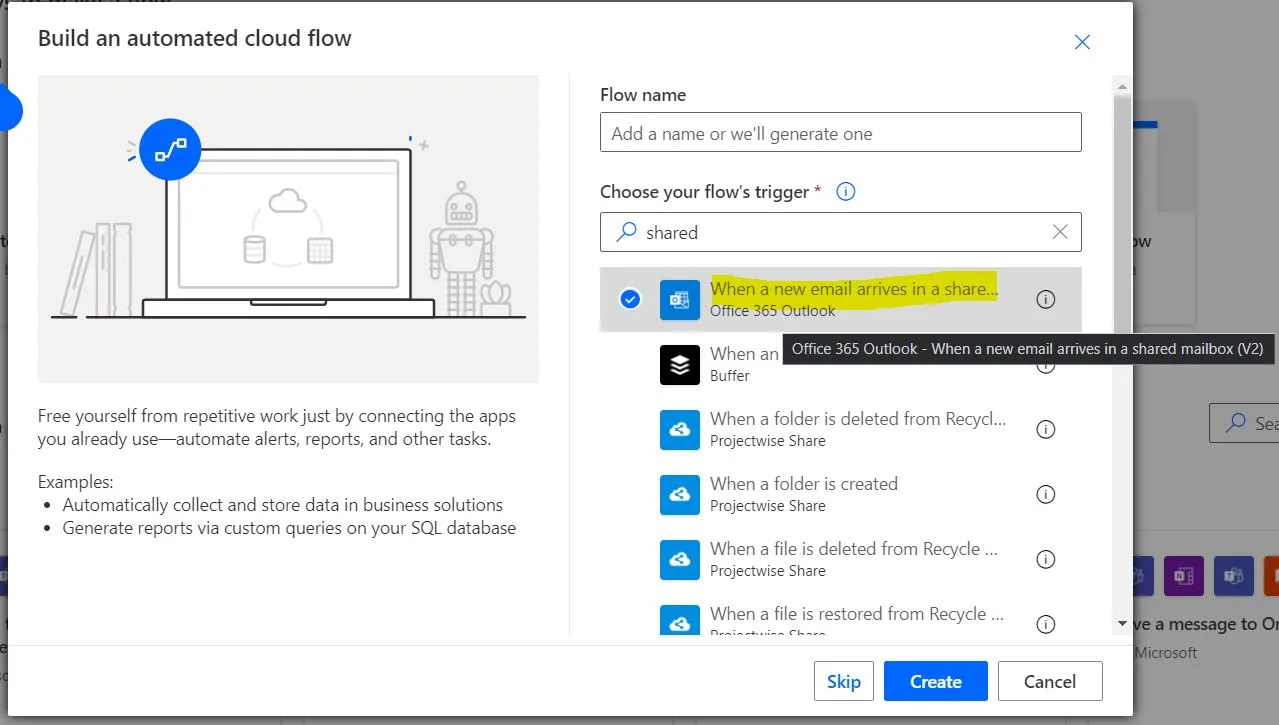
- Create a new Automated cloud flow using the “Office 365 Outlook” that triggers when a new email arrives in a shared mailbox
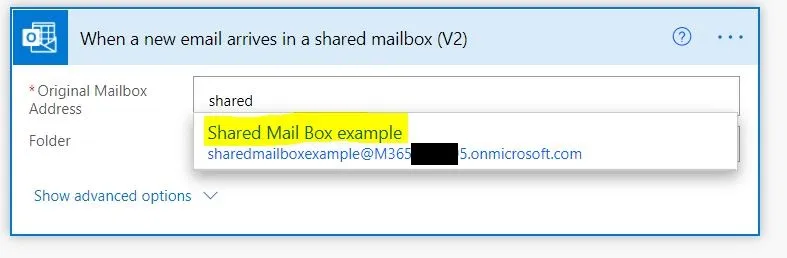
- Enter in the shared mailbox we created earlier in the “Original Mailbox Address.”
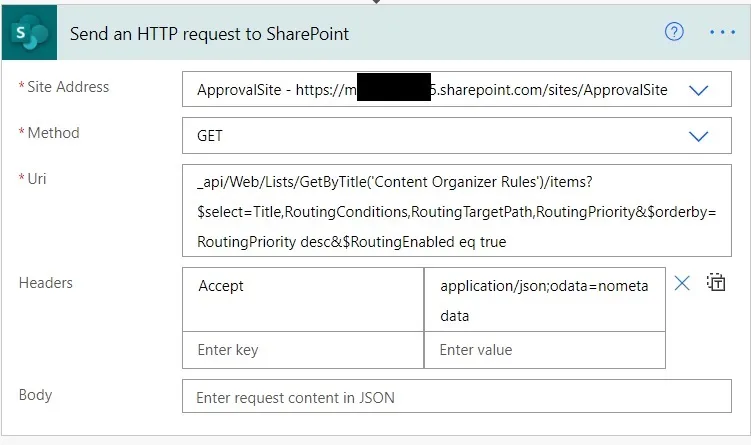
- After the trigger, we will add the action “Send an HTTP request to SharePoint.” The action will retrieve the rules that we created in the “Content Organizer” and use them to sort out an email. Kindly fill up the following information
Site Address: Try to find your site collection here Method : Get Uri : _api/Web/Lists/GetByTitle(‘Content Organizer Rules’)/items?$select=Title,RoutingConditions,RoutingTargetPath,RoutingPriority&$orderby=RoutingPriority desc&$RoutingEnabled eq true Headers: “Accept” “application/json;odata=nometadata”
-
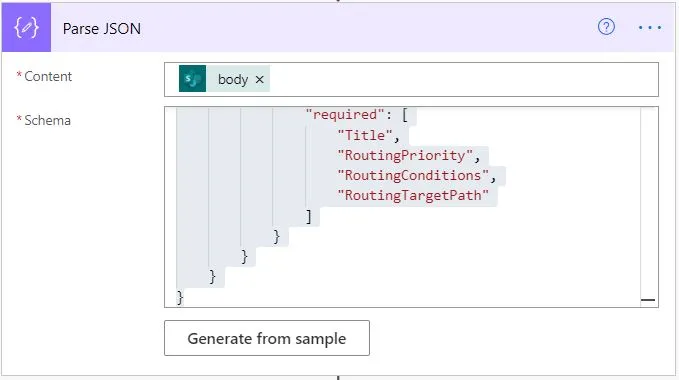
After the “Send an HTTP request to SharePoint” action, we will now use a “Parse Json” action:
-
Content: body
-
Schema:
{
  "type": "object",
  "properties": {
    "value": {
      "type": "array",
      "items": {
        "type": "object",
        "properties": {
          "Title": {
            "type": "string"
          },
          "RoutingPriority": {
            "type": "string"
          },
          "RoutingConditions": {
            "type": "string"
          },
          "RoutingTargetPath": {
            "type": "string"
          }
        },
        "required": [
          "Title",
          "RoutingPriority",
          "RoutingConditions",
          "RoutingTargetPath"
        ]
      }
    }
  }
}
-
After that, we will use the loop to loop inside the value and loop to each rule
-
After looping, we will know to get the Routing condition to upload the whole email in SharePoint. To export, we can use the “Export Email (V2)” action then use the “Create File” action of SharePoint

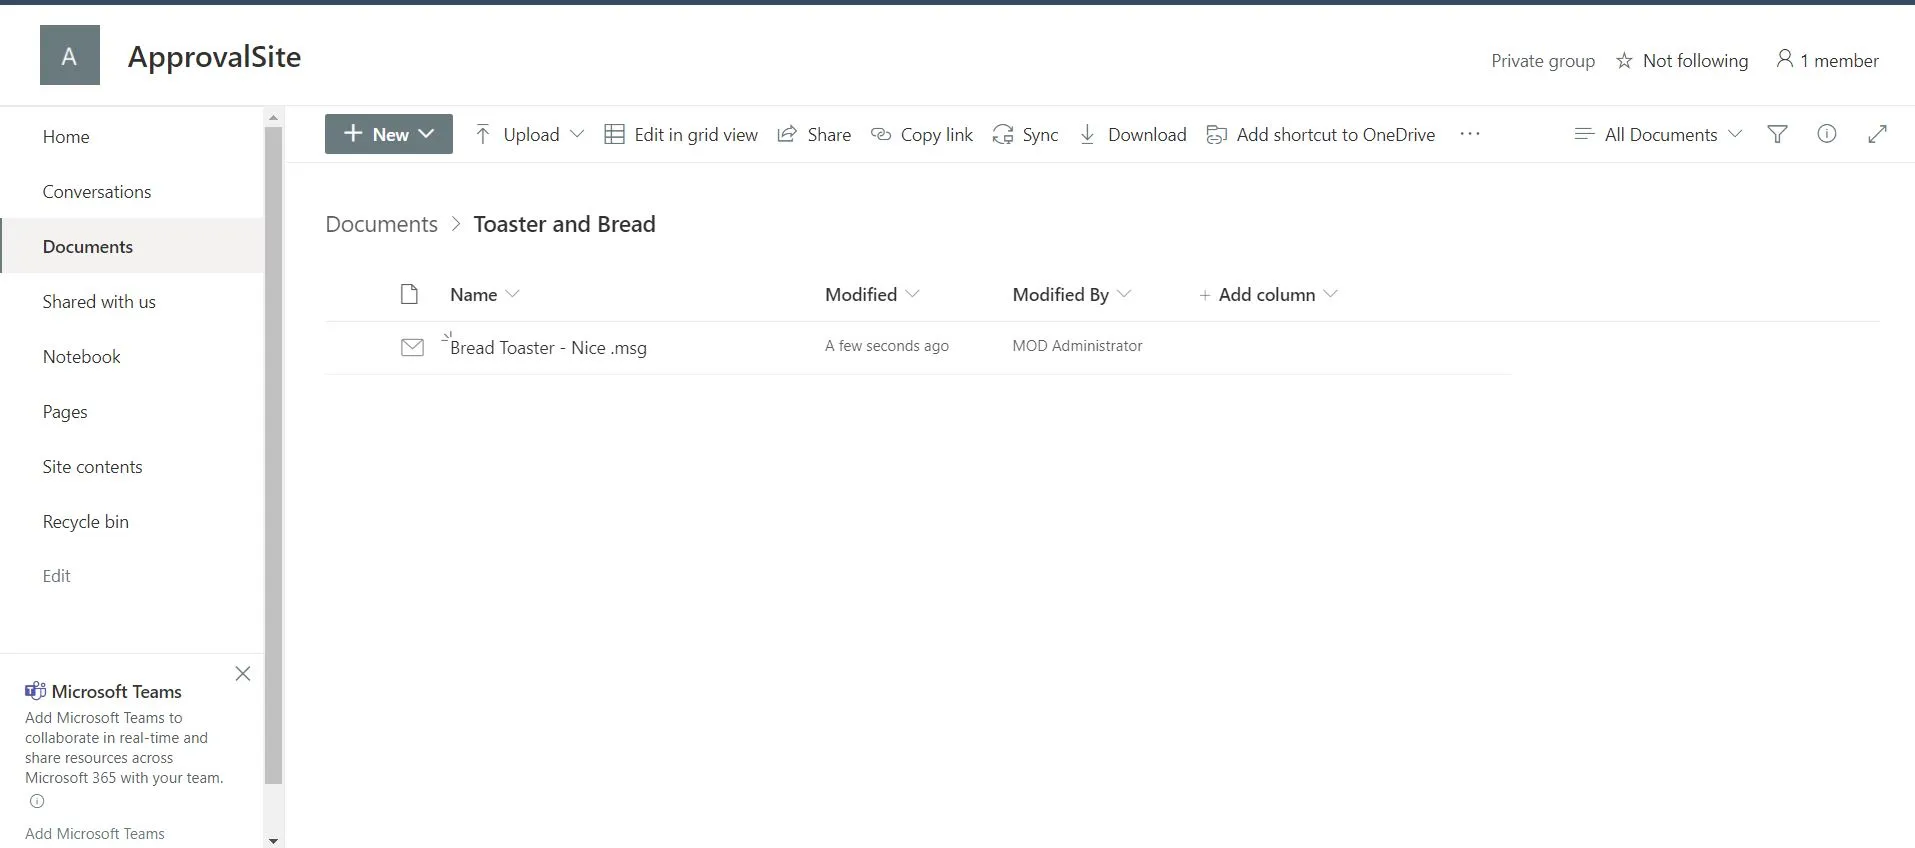
- Now, lets test it out by trying to send an email to the shared mailbox with the keyword we are looking for in the subject email
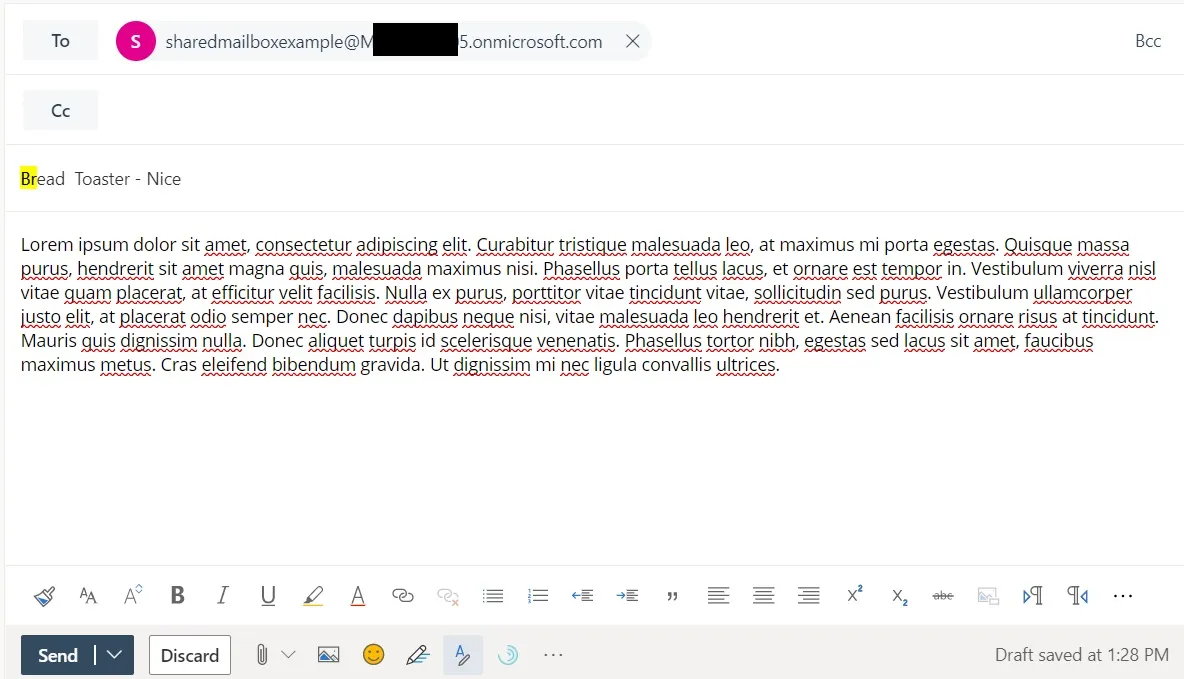
- After a couple of minutes, it should upload our whole email to the “Toaster and Bread” in Sharepoint to the folder we specified in our Content Organizer rule.
Need help building or stabilizing Power Apps connected to SharePoint?
I help organizations design Power Apps and Power Automate solutions that are maintainable, governed, and easier to support after launch.
Billy Peralta
SharePoint & Microsoft 365 Specialist • 16+ Years Experience
If you have questions about your SharePoint environment, feel free to reach out.
Need help building or stabilizing Power Apps connected to SharePoint?
I help organizations design Power Apps and Power Automate solutions that are maintainable, governed, and easier to support after launch.