How to Add Search Refiners to SharePoint Site Collections

4 min read

Topics: O365, M365, SharePoint Online, Search Refiner
Here are some OOB neat Features you could use to make your SharePoint Sites more searchable for our users.
Step 1: Create the content type and site column
First, we need to create a Content Type that we could add to our Site.
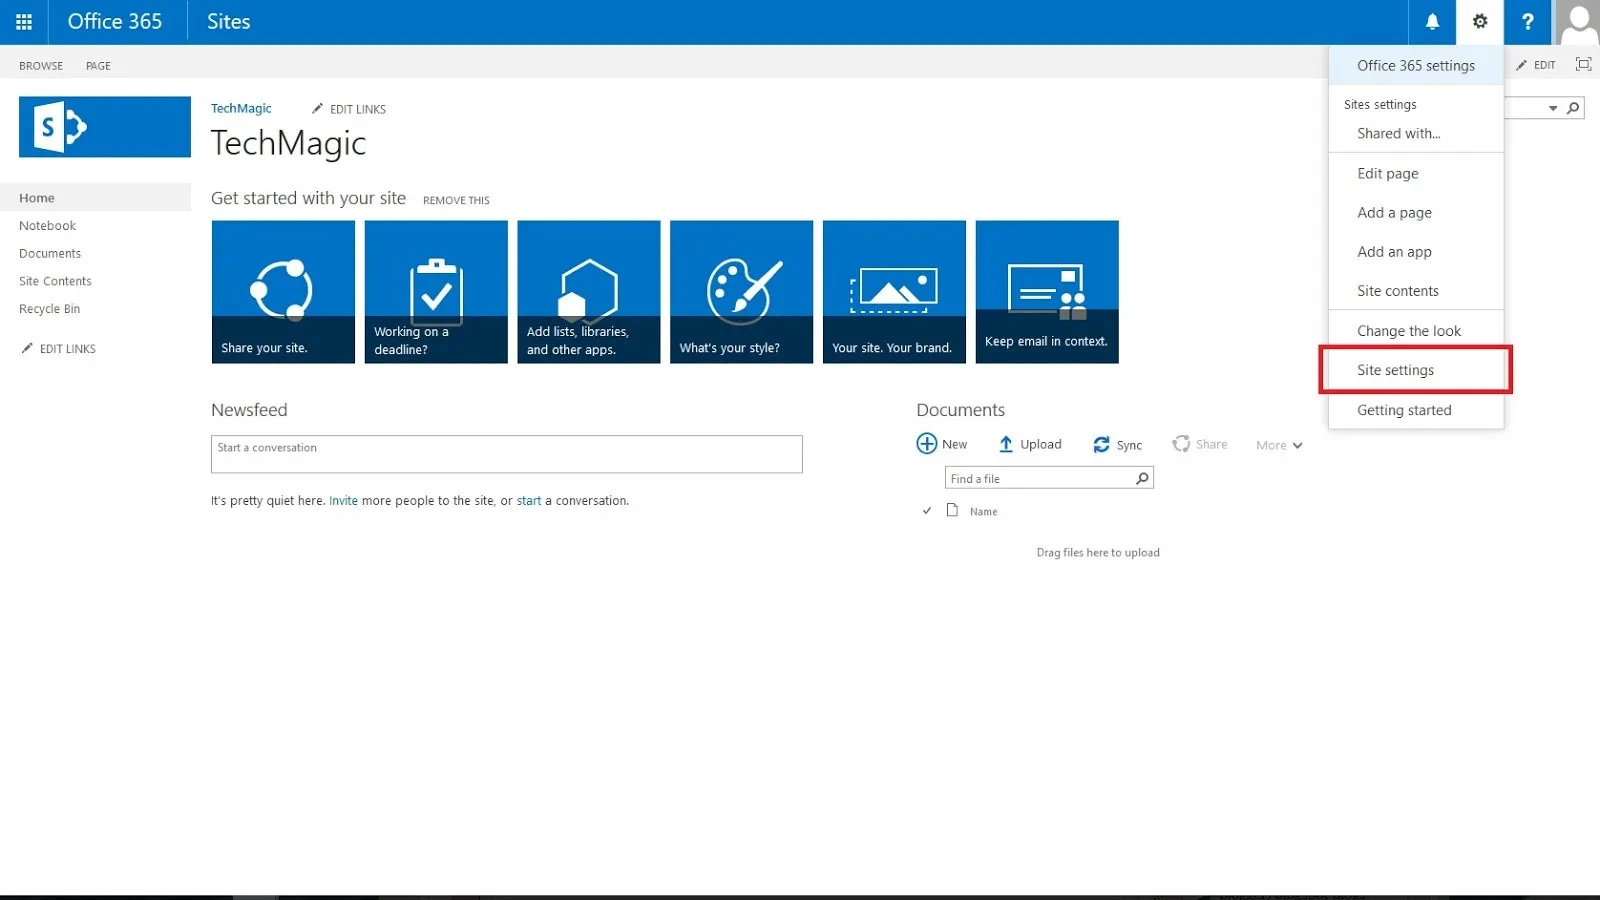
For this sample, I am going to put a country property in my Site Collections. In our Content Type Hub Site, go to our Site Settings
Once you’re in the Site Settings Page, find and select the “Site content types” under the “Web Designer Galleries.”
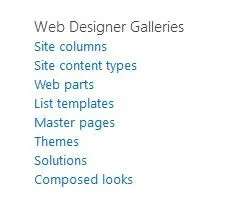
This will redirect us to a page where all content type is created. Click on the Create to Start Creating our Content Type.
Kindly put in the Name of the content type we wanted. For the “Select parent content type from,” select “Document Content Type” and for the “Parent Content type” kindly select the “Basic Page.”
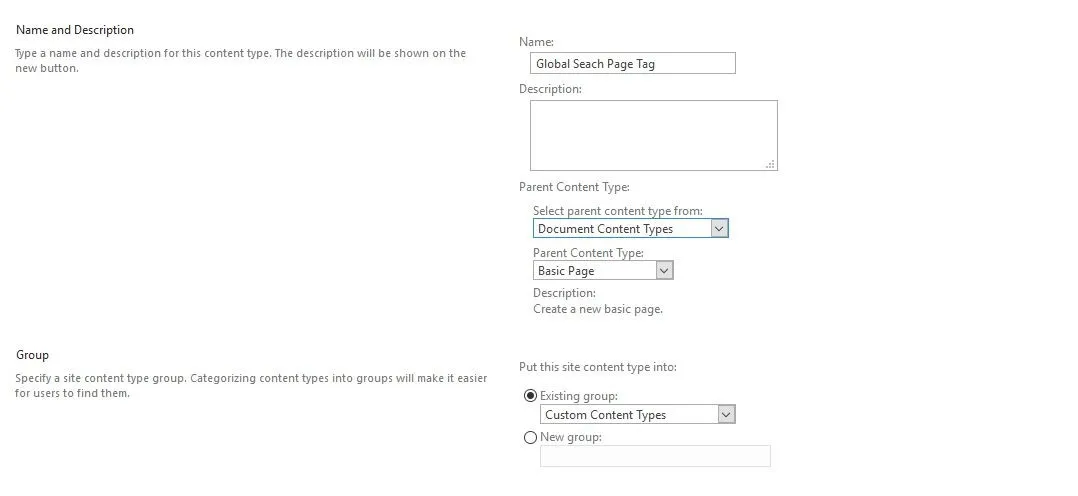
Click OK to save your changes. Once our Content type is created, we may now start adding the Site Columns we wanted. Click on the “Add from new site column” link to begin by adding Site Columns to our Content type.
We will be a Site Columns in our Content type.
- Global Funding Source
These will be choice fields with the following choice.
-
Funding Source1
-
Funding Source2
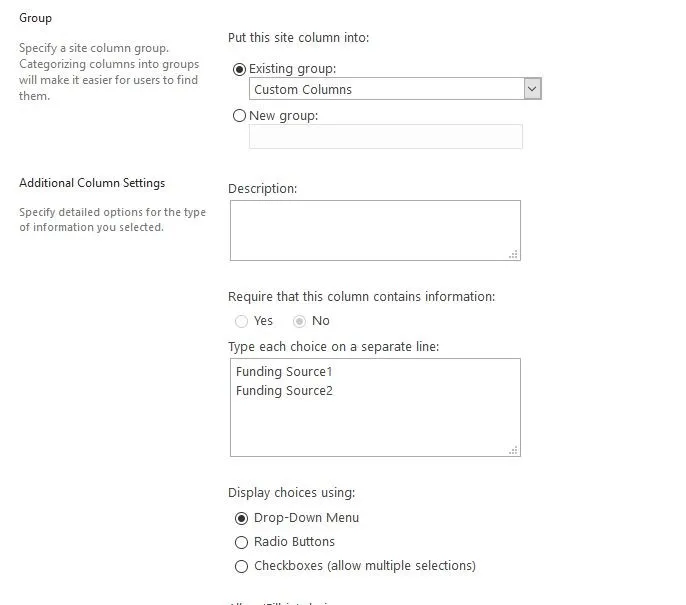
Hit OK to save our Site Column. We will be redirected back to our newly created Content Type; for now, we will apply this content type to all our Site Collection. Click and select the “Manage publishing for this content type” link.
Once the page has loaded, select “Publish” and then hit save.
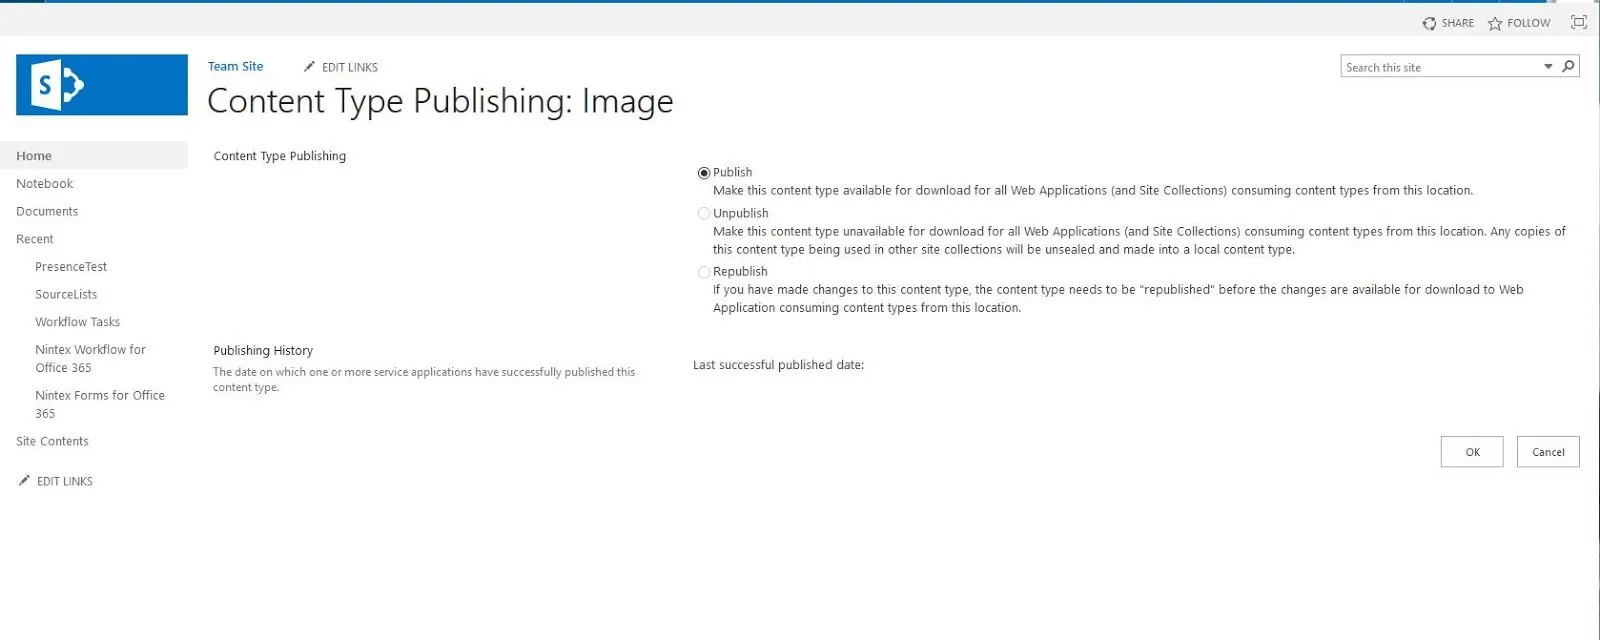
Let’s wait for 10-30 minutes for the Content type to show up to all our site collections (Defending on the number of Site Collections on our Farm).
Step 2: Apply the content type to the site’s home page
Once we have verified that the Content Type we created earlier is already showing up to our Site Collection, let Go to Site Content, then Search for the “Site Pages” or “Page” Library(Where your Default Page is stored).
In our example, my homepage is stored in the “SitePages” library
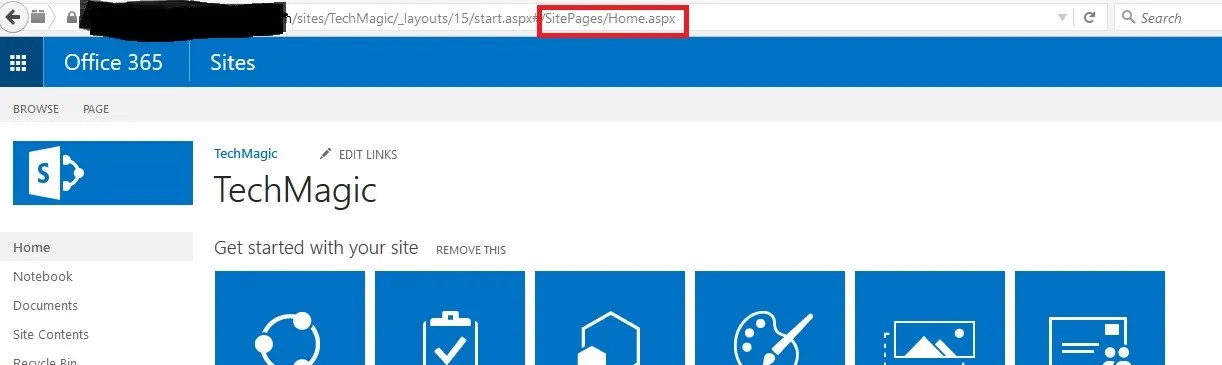
Once you’re in the Site Page Library, in the ribbon, select on the Library > Library Settings
Under the Content type section, select the “Add from existing site content types” link. This page will give you all the available Content-Type for our Library. Select the Content Type we have created earlier, the “Global Seach Page Tag” Content type
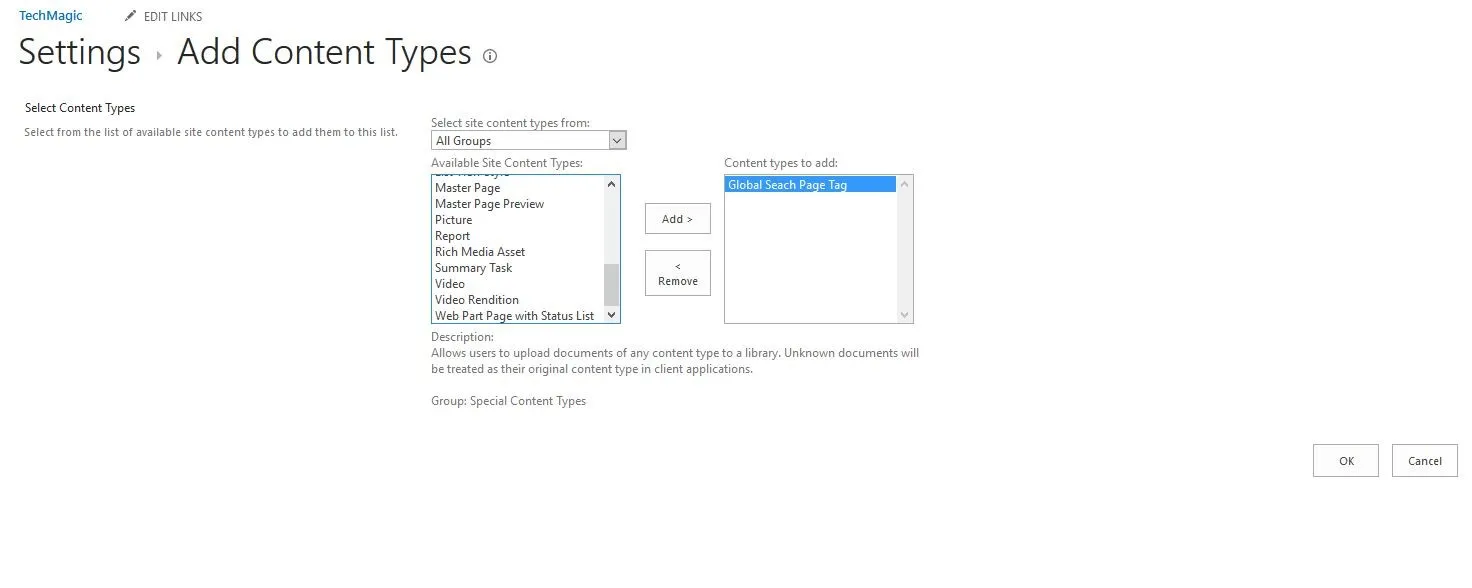
Hit OK to add our Content type to our Library. Now go back to our Site Page Library.
We now need to add additional properties to our Homepage(Home.aspx). We can do that by displaying or adding the Site Columns in the default view by going to the “Library> Modify View” in the Ribbon. Check or Enable the check box for our Column(“Global Funding Source”)
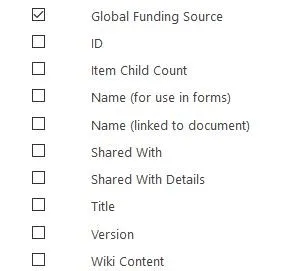
With this, the “Global Funding Source” column should now be displaying our default view. Now we need to add value to it. On the ribbon, select Library>Quick Edit.

Again we need to wait for Search to pick up our settings(let’s wait for 10-30 mins).
Step 3: Add the refiner to your Search Center
Now let’s go to our Search center and add a new Search Page. I named the Page I created “Funding Source Page.” Now on our new Page, click on the Edit Page
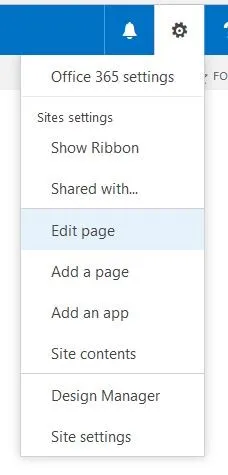
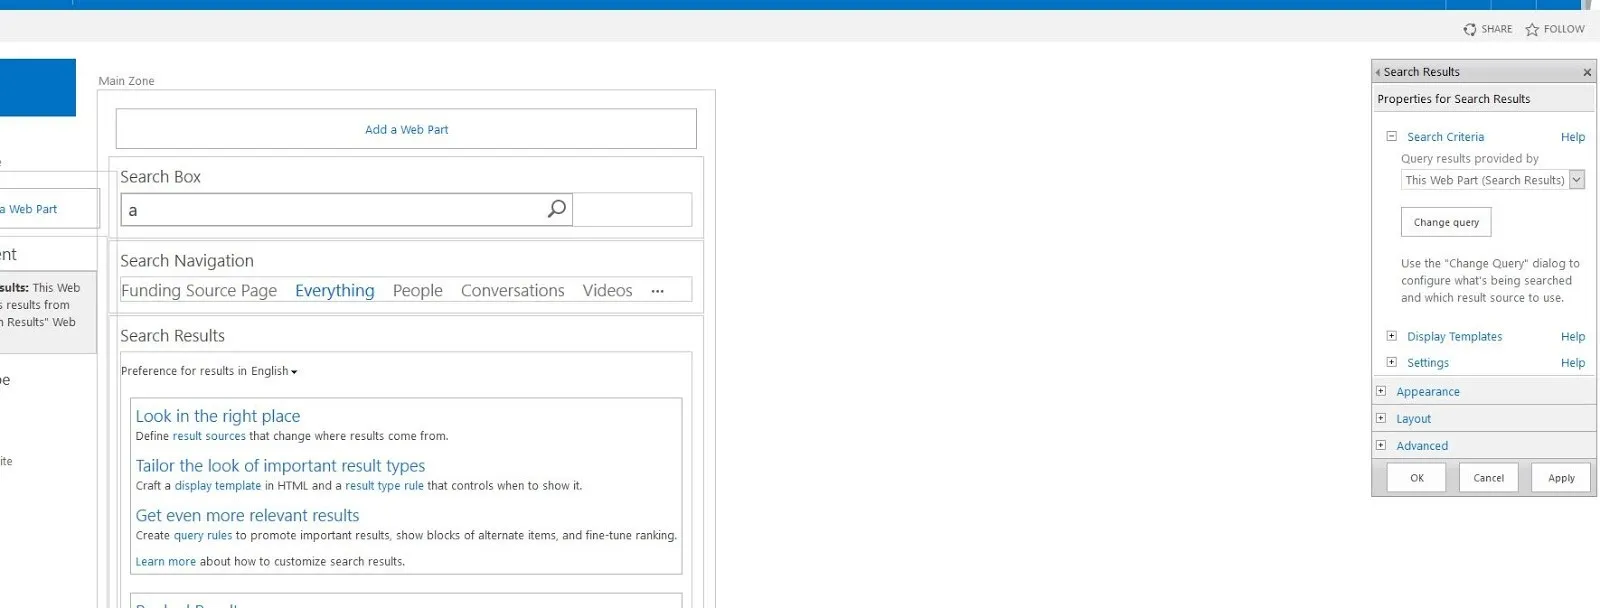
We will now modify our Search Results; we can do that by editing the property of the “Search Results” Web part. Click on the “Change Query” button.
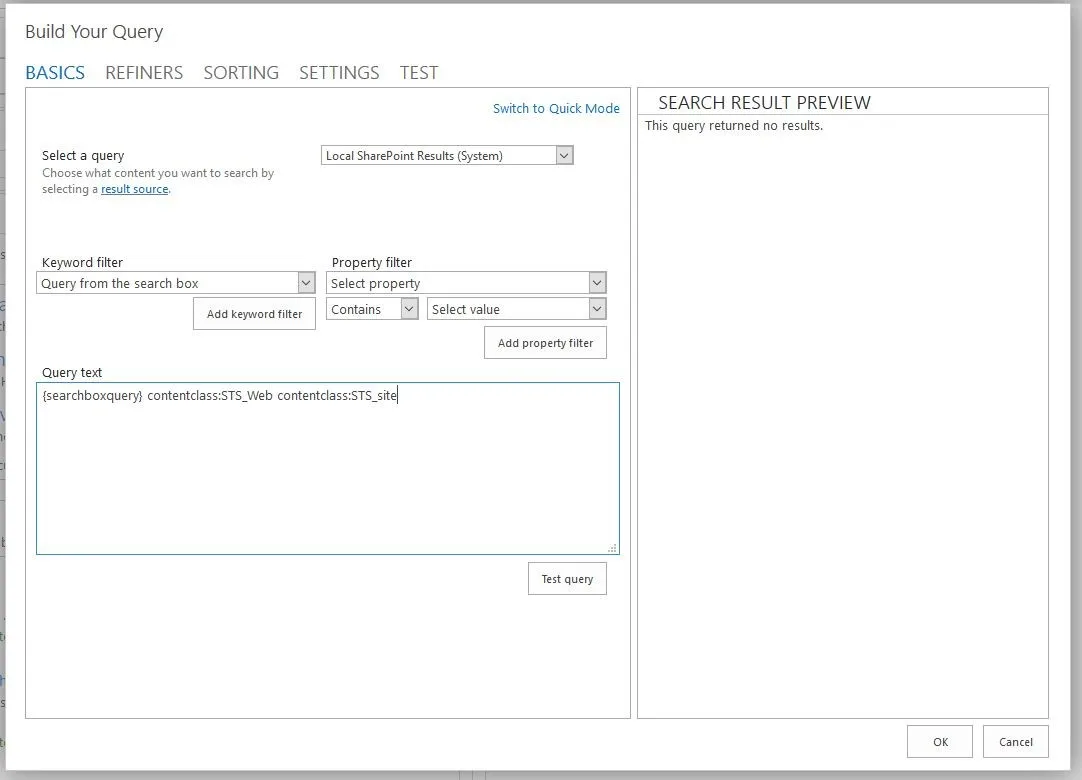
Click on the “Switch to Advanced Mode” so that we can specify our query. In the Query textbox, type in the following Query {searchboxquery} contentclass:STS_Web contentclass:STS_site then hit OK to apply our changes. The following query will limit the results to show Site Collection and Subsite only
Click on Apply to save our changes to the page. We will now add our new Refiner. In the Refinement Web part, click Edit Web part. Click on the “Choose Refiners” button. I mapped the column that we created earlier(“Global Funding Source”). Click here to view how I mapped the property.
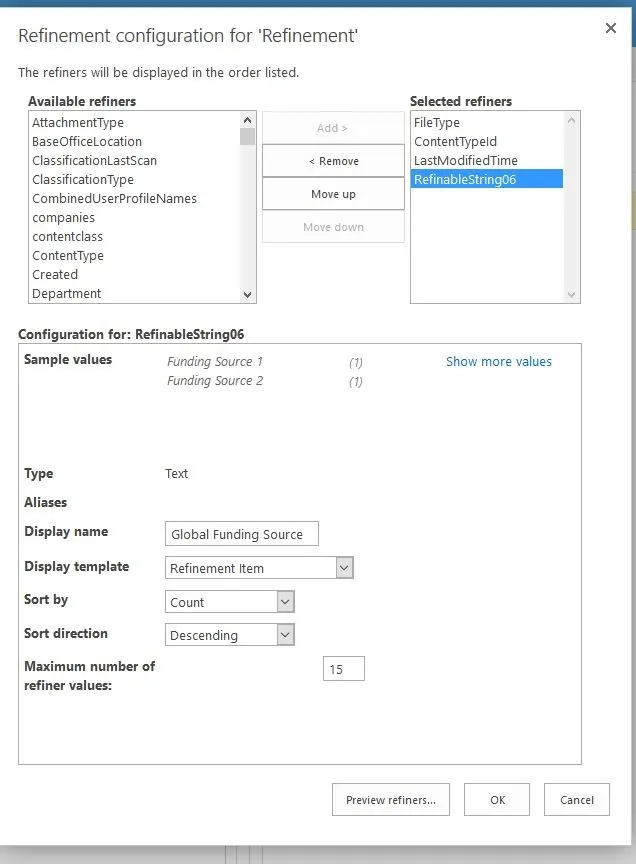
Now moving the RefinableString to the Selected Refiner and giving it a DisplayName, I could use it to refine the Site in my Search Center. With this, I can add properties to my Site collection like Country or Department so that my User will have a more effortless experience finding a site collection they need. (Don’t forget to check-in everything and publish)
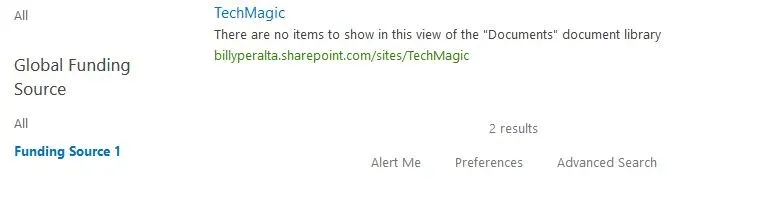
Now that should allow your users to refine a site based on the given choices. This search refiner would help them find the site/site collection they are looking for easier and faster.
Search refiners are one piece of a findable intranet. If you are planning site structure, metadata, and search for a SharePoint intranet, see my SharePoint intranet consulting page.
Modernizing a SharePoint intranet?
I help organizations plan hub sites, navigation, search, and page templates so people can find what they need, with SPFx where the built-in web parts fall short.
Free SharePoint planning resource
Planning a SharePoint migration or governance cleanup?
Download the SharePoint Migration & Governance Readiness Checklist to review migration scope, permissions, governance, Teams/OneDrive strategy, retention, and Copilot readiness.
Download the Checklist
SharePoint architect & Microsoft 365 consultant • 16+ years of experience
If you have questions about your SharePoint environment, feel free to reach out.